Quick Answer
If you’re wondering which weight of Double Brushed Polyester Knit is best, the answer depends on what you’re making.
After comparing 170g (Light DBP), 200g (Medium DBP), and 250g Heavy Double Brushed Polyester Knit, I found that each one has its own strengths.
- 170g DBPversion felt light and flexible in my hands. It is a great option for projects where you want a softer, lighter feel, such as summer tops, dresses, pajamas, or layering pieces.Many customers in hot parts of the United States prefer this weight because it feels cooler to wear while still providing enough coverage. Although it’s our lightest option, the knit construction is dense enough that it isn’t overly sheer like many lightweight knits.
- 200g DBPis the weight I suggest most often because it strikes a great balance between comfort and versatility. It has a little more body than 170g without feeling heavy, making it suitable for T-shirts, dresses, leggings, and everyday clothing. Even though it’s lighter than 250g, it still offers excellent coverage and doesn’t feel see-through during normal wear.
- 250g DBP has the richest hand feel of the three. It feels buttery soft, offers the best shape retention, and provides extra structure, which is exactly why I chose it for this children’s outfit. If I’m sewing garments for cooler weather or projects that need a little more substance, this is usually my first choice. That said, during the hotter summer months, I personally find myself recommending the 200g DBP more often because it provides a similar softness with a lighter, more breathable feel.
None of these fabrics is objectively better than the others.
The real question is which weight best matches the project you’re planning to sew.
To answer that question, I tested all three fabrics before making my final decision.
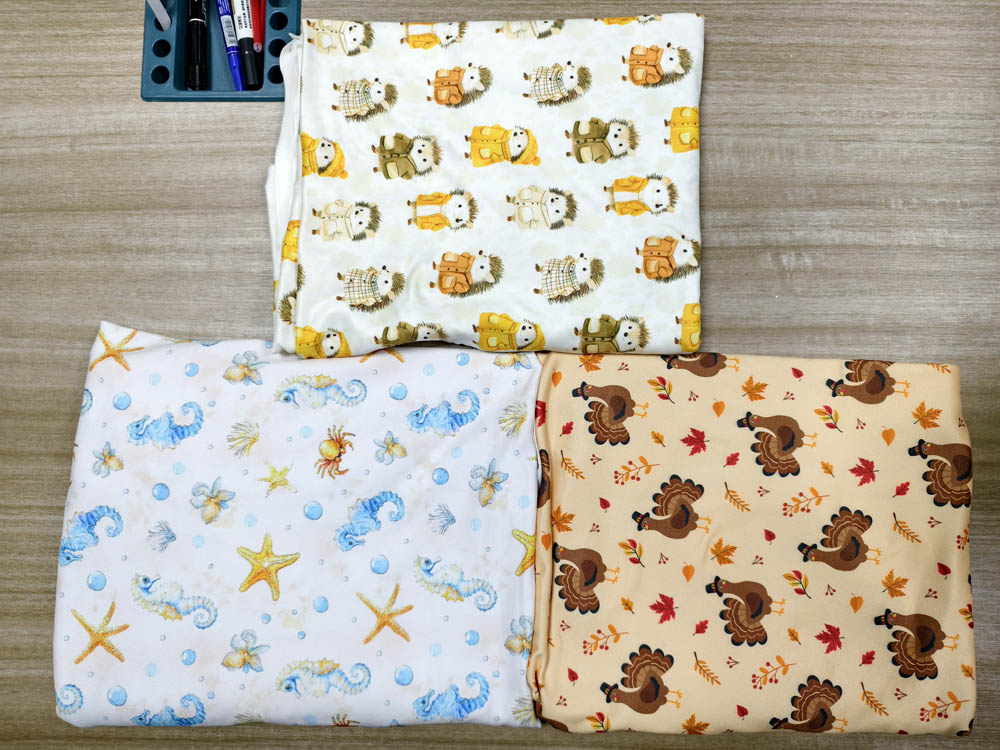
Why I Decided to Compare All Three Weights
When these three fabrics arrived on my worktable, I already knew I wanted to sew a matching children’s outfit.
My original plan was simple:
Choose one fabric and start sewing.
But after laying all three fabrics side by side, I realized this was the perfect opportunity to answer one of the questions I hear most often:
“Which weight should I choose?”
It’s a question that doesn’t have one universal answer.
A lightweight summer dress doesn’t need the same fabric as a children’s sweatshirt.
A pair of leggings behaves differently from a hoodie.
Instead of assuming that the heaviest fabric would automatically be the best, I decided to compare them the same way I compare every knit fabric before sewing.
My Fabric Quality Check
One thing I always pay close attention to when comparing different fabric weights is how the weight has been achieved.
In the textile industry, a lighter fabric doesn’t always mean a better fabric.
Sometimes manufacturers reduce the weight by using fewer yarns or a looser knit construction. While that lowers the GSM, it can also make the fabric feel thinner, less stable, or more transparent.
As someone who sews regularly, those differences become obvious the moment the fabric reaches the cutting table.
So before evaluating softness or stretch, I wanted to answer one simple question:
Do these three weights feel like the same quality fabric, or does the lighter weight feel like a compromised version?
After placing all three fabrics side by side, my first impression was reassuring.
Although the GSM changed from 170g to 250g, the brushed surface, knitting consistency, and overall finish remained remarkably uniform.
The difference wasn’t that one fabric felt “cheap” while another felt “premium.”
Instead, each weight simply offered a different balance of body and drape while maintaining the same overall quality.
That consistency immediately gave me confidence that the weight differences came from thoughtful fabric engineering—not from reducing material or cutting corners during production.
As a sewist, that’s exactly what I hope to see when choosing between different fabric weights.
Test 1: Comparing the Weight and Hand Feel
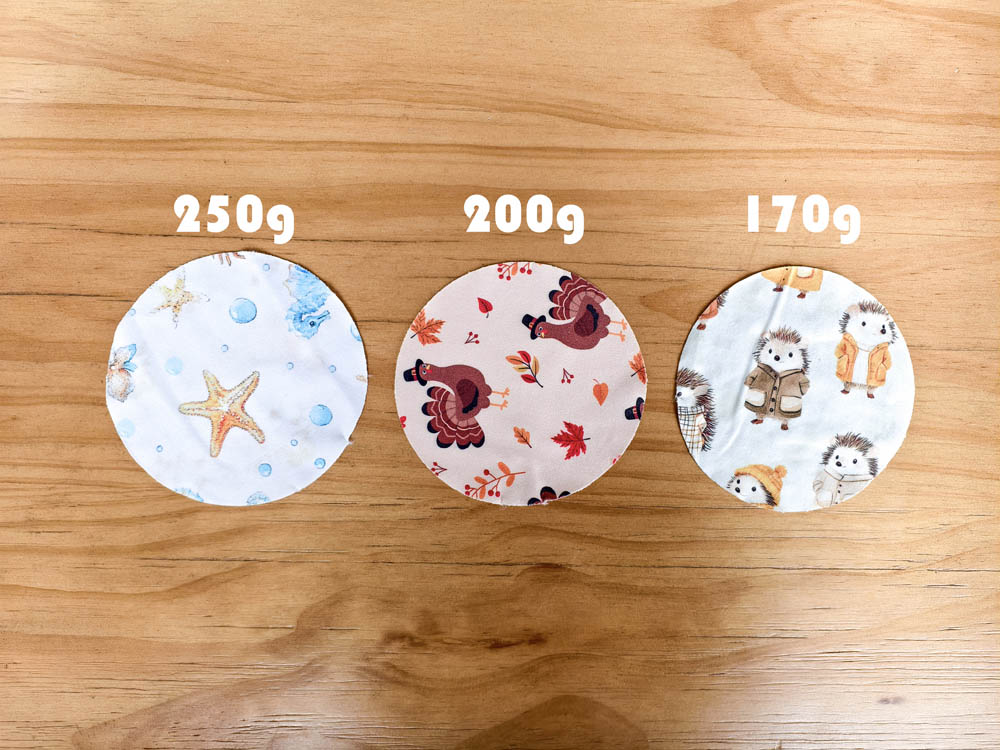
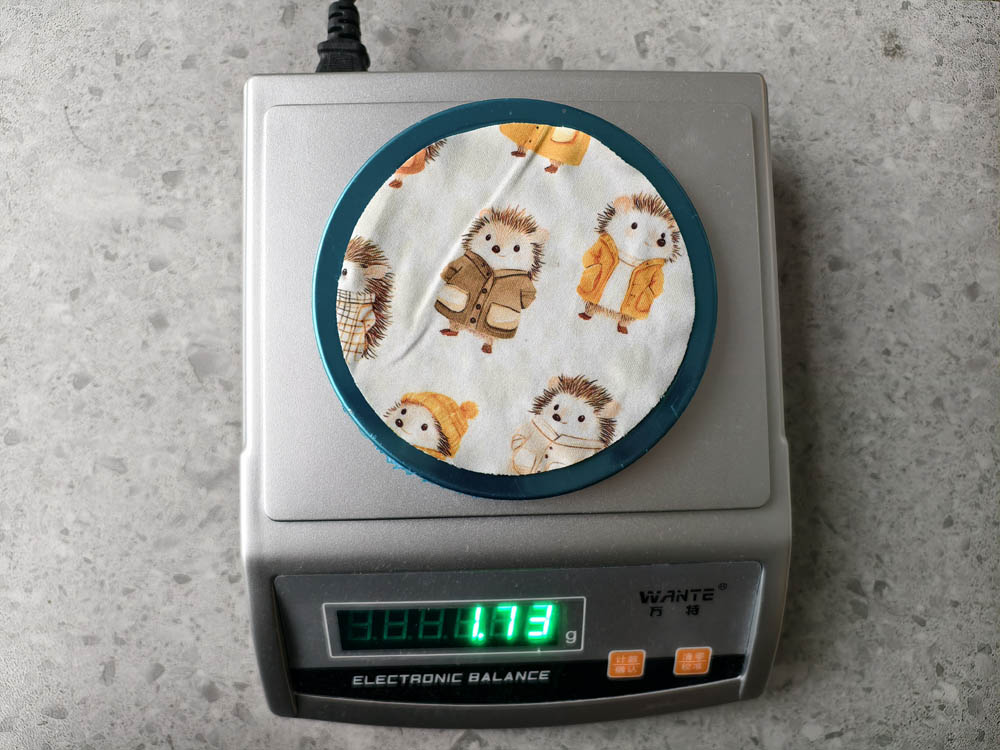
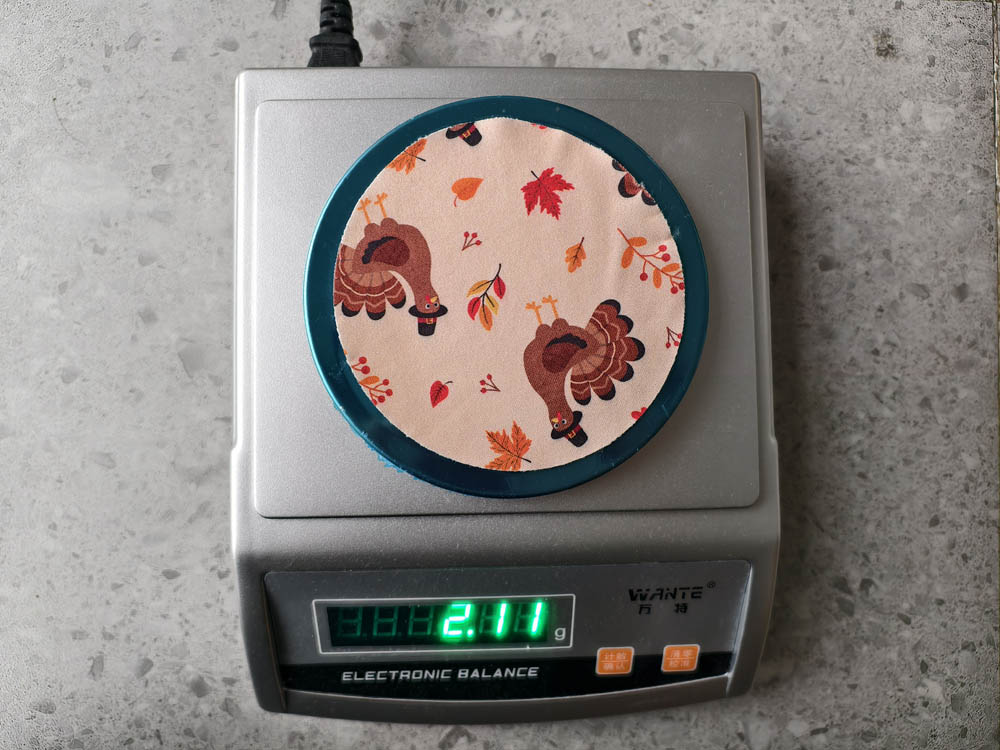
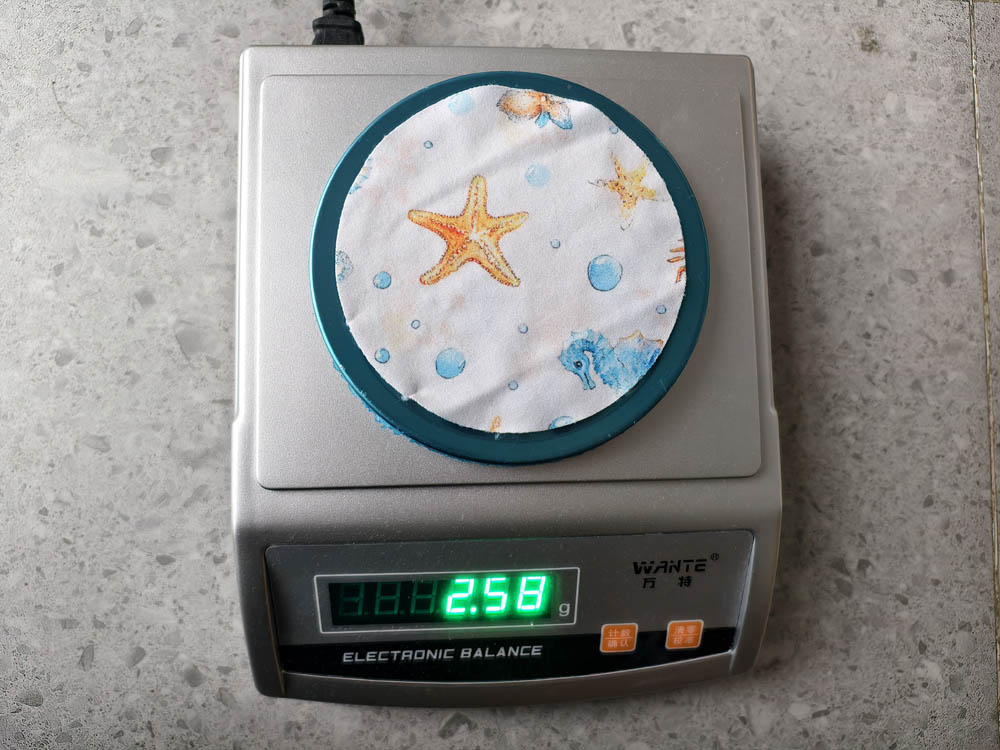
| Fabric | Tested Weight | Observation |
| 170g DBP | 173gsm | Lightweight but dense enough for good coverage |
| 200g DBP | 211gsm | Balanced thickness and softness |
| 250g DBP | 258gsm | More structure and body |
With the quality check complete, I moved on to something every sewist notices immediately—the way a fabric feels in your hands.
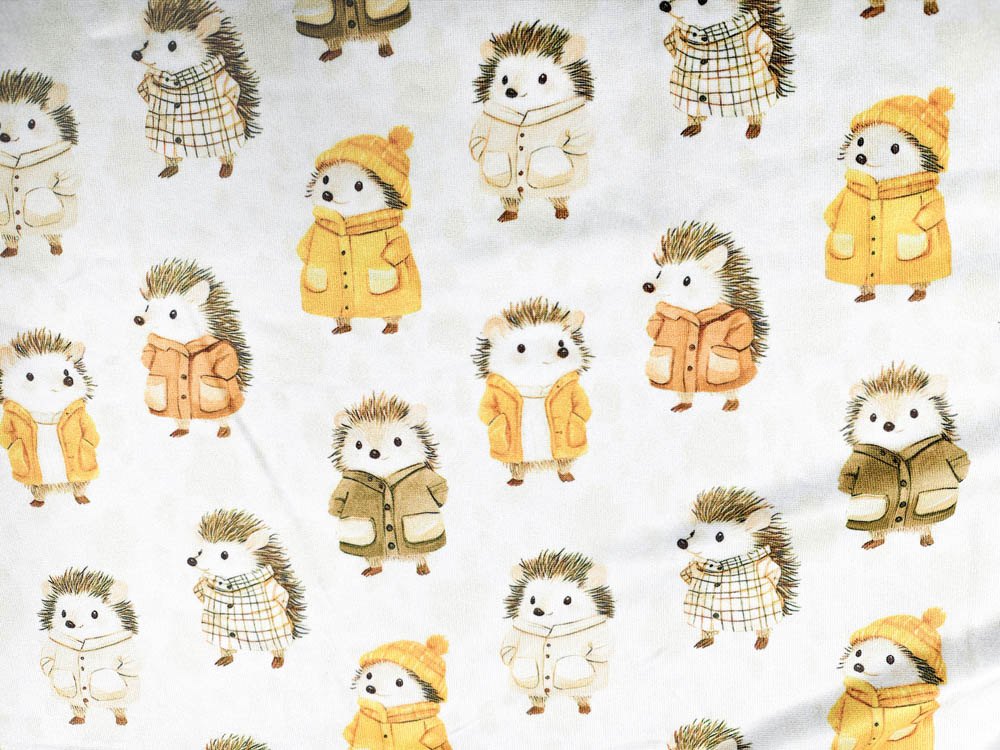
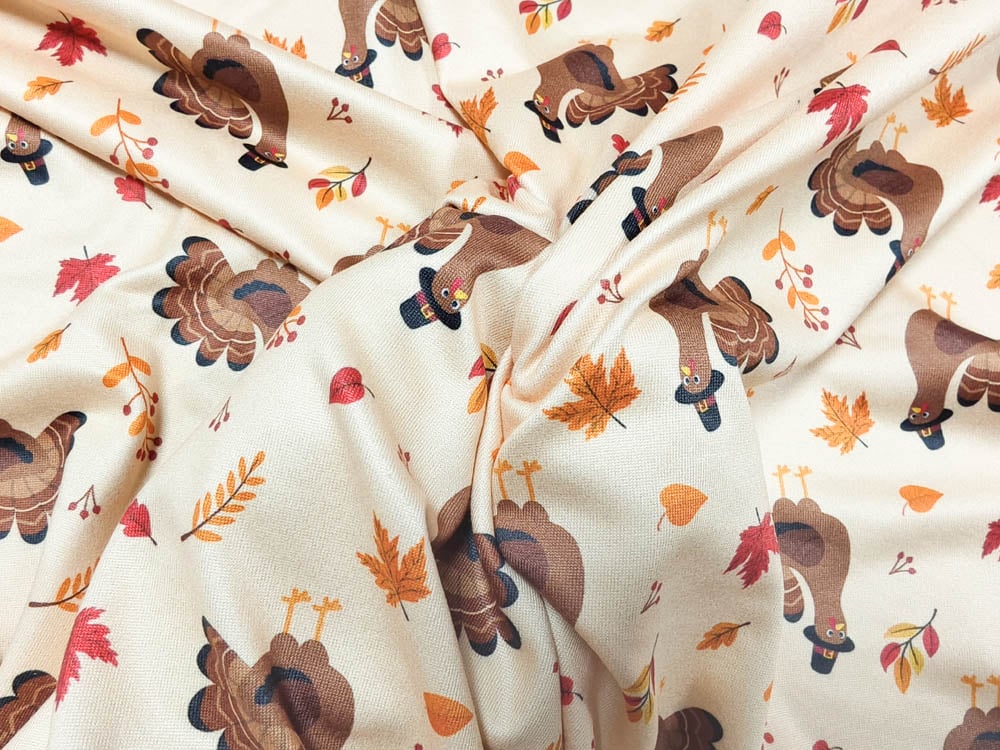
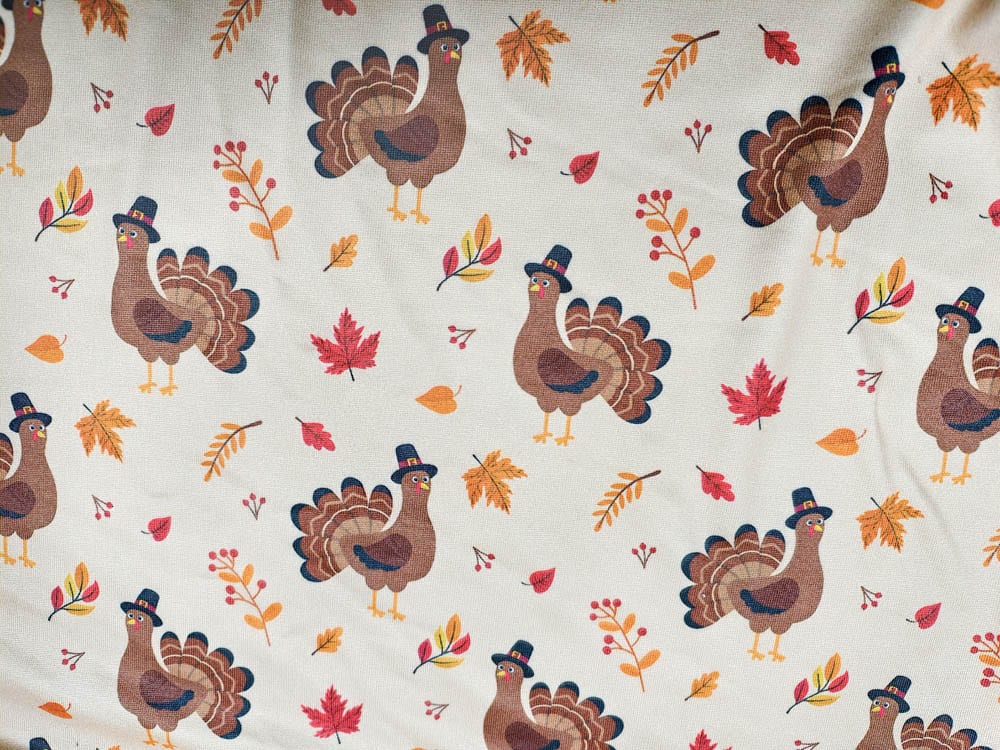
Although all three fabrics shared the same soft brushed finish, each one gave a slightly different first impression.
170g Double Brushed Polyester Knit
The 170g fabric felt light, airy, and fluid.
It moved beautifully when lifted and had a natural drape that immediately made me think of summer clothing.
Despite being the lightest option, it didn’t feel flimsy or overly sheer.
The compact knit construction provided much better coverage than I expected from a lightweight knit.
200g Double Brushed Polyester Knit
The 200g version felt like the perfect middle ground.
It added a little more body without losing the soft, flexible feel that makes DBP so enjoyable to sew.
If I hadn’t been comparing all three fabrics side by side, I probably would have described this weight as “just right” for most everyday garments.
250g Double Brushed Polyester Knit
The 250g fabric felt noticeably fuller in my hands.
Rather than feeling heavy, it simply had more substance.
Its buttery-soft surface was identical to the lighter weights, but the extra body suggested better shape retention for garments that experience frequent movement and washing.
Test 2: Stretch & Recovery
Next came the stretch test.
Rather than measuring percentages, I simply stretched each fabric repeatedly in both directions and watched how quickly it returned to its original shape.
This is one of the quickest ways I evaluate knit fabrics before sewing.
170g
The lightest fabric stretched very easily and recovered smoothly.
Its flexibility made it feel especially comfortable for lightweight garments that benefit from freedom of movement.
200g
The 200g fabric delivered what I felt was the most balanced stretch.
It wasn’t overly soft or overly firm.
The recovery remained excellent after repeated stretching, making it easy to imagine in everything from T-shirts to leggings.
250g
The 250g version offered slightly more resistance during stretching, but it recovered almost instantly every time.
That extra resilience gave me confidence that neckbands, cuffs, and waistbands would continue holding their shape after regular wear.
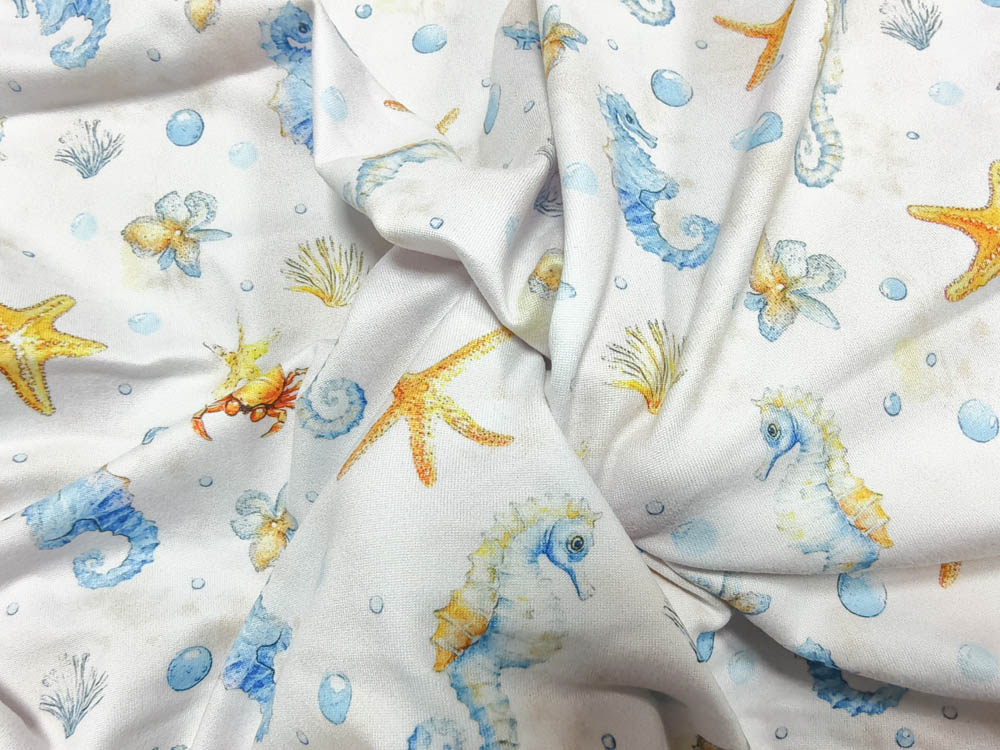
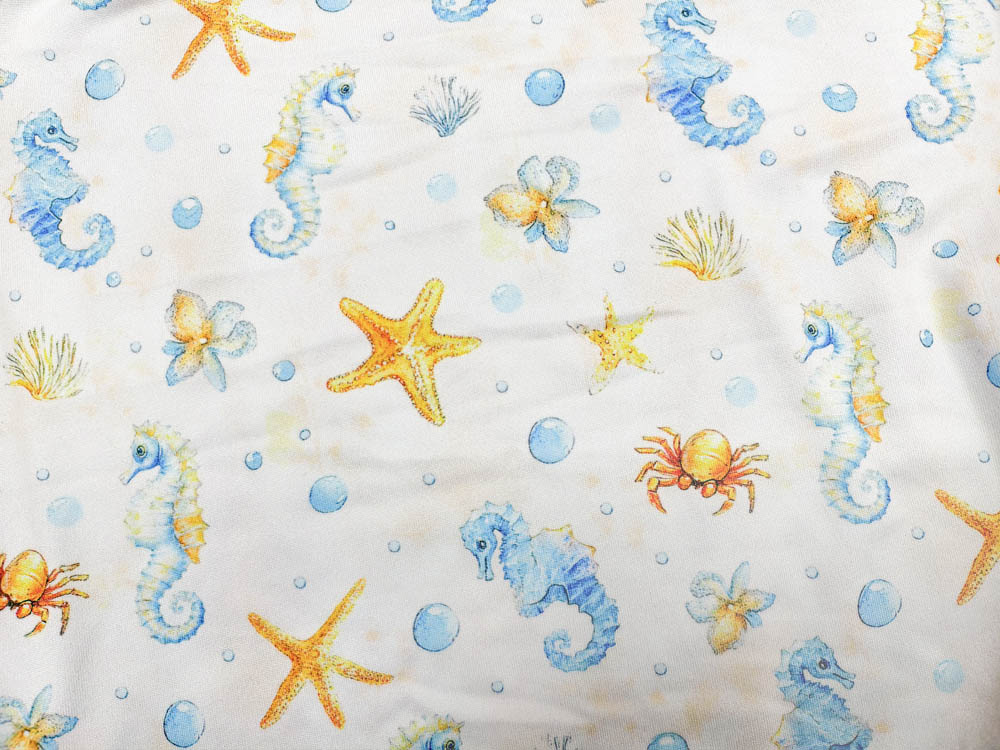
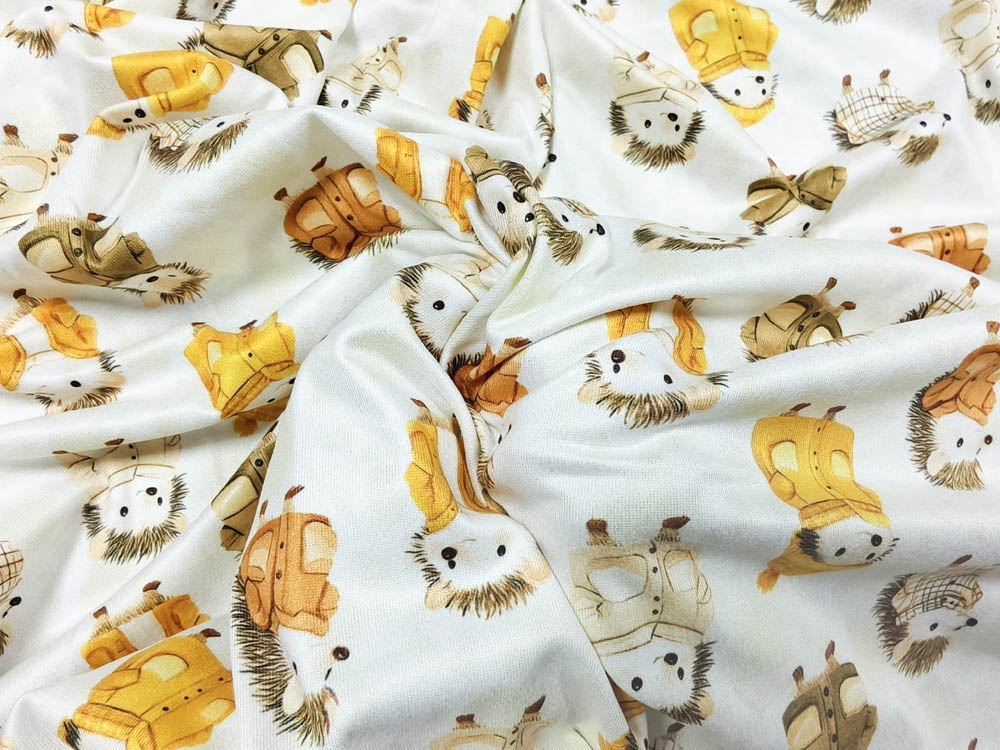
Besides, I also tried out the anti-wrinkle properties of these three fabrics. I scrunched each one tightly for a few seconds, then smoothed them out by hand. All three recovered quickly with no permanent creases—the 170g and 200g flattened almost instantly, while the 250g took just a gentle tug. In short, none of them need ironing for everyday wear.
My First Conclusion
After comparing the three fabrics, I realized I had been asking the wrong question.
The goal wasn’t to decide which weight was the best.
The real question was:
Which weight best suited the garment I wanted to make?
All three fabrics shared the same high-quality brushed finish, smooth knitting, and reliable stretch recovery.
Since my goal was to sew a children’s outfit that would be soft, comfortable, and durable enough for everyday wear, I decided to continue the project with the 250g Double Brushed Polyester Knit.
The real test, however, was still ahead.
Would it perform as well under the sewing machine as it had during my initial evaluation?
That’s exactly what I set out to discover next.
Sewing the Children's Outfit: My Step-by-Step Process With 250g DBP
After testing the three weights of Double Brushed Polyester Knit, I decided to use the 250g DBP for this children’s outfit.
The fabric tests helped me understand how each weight behaved, but the sewing process was where I could truly evaluate the fabric.
Before starting, I wanted to pay attention to the details that matter most when working with knit fabrics:
- Does the fabric stay stable during cutting?
- Is it easy to align pattern pieces?
- Does it stretch evenly while sewing?
- Do seams recover after movement?
For this project, I created a Size 90 girls’ top and matching pants using 250g Double Brushed Polyester Knit.
Size Chart: Girls’ Top (Size 90)
Before cutting, I always check my measurements carefully.
The following measurements were used for this Size 90 girls’ top.
Measurements are provided in centimeters, with approximate inches for my US sewing friends.
Measurement | cm | Inches (approx.) |
Chest | 59 | 23 ¼” |
Shoulder Width | 22.5 | 8 ⅞” |
Sleeve Length | 13 | 5 ⅛” |
Garment Length | 43 | 16 ⅞” |
Waist | 43 | 16 ⅞” |
Hip | 51 | 20” |
Pants Length | 36 | 14 ⅛” |
Crotch Depth | 20 | 7 ⅞” |
Please remember that this chart is only a starting point.
Every child has a slightly different body shape, so I always recommend checking actual measurements before cutting.
A small adjustment can make a big difference in comfort and fit.
Preparing the Fabric Before Cutting
Before cutting anything, I laid the 250g Double Brushed Polyester Knit completely flat on my cutting table.
For knit fabrics, checking the stretch direction is one of the most important steps.
I positioned the fabric so that the stretchiest direction ran horizontally around the body.
This allows the garment to stretch comfortably across the chest and back instead of pulling vertically when the child moves.
One thing I immediately noticed about the 250g DBP was its balance.
Although it had excellent stretch, it was not overly slippery or difficult to control.
The slightly heavier weight helped the fabric stay flat while cutting, which made the preparation process much easier.
Cutting the Front and Back Pieces
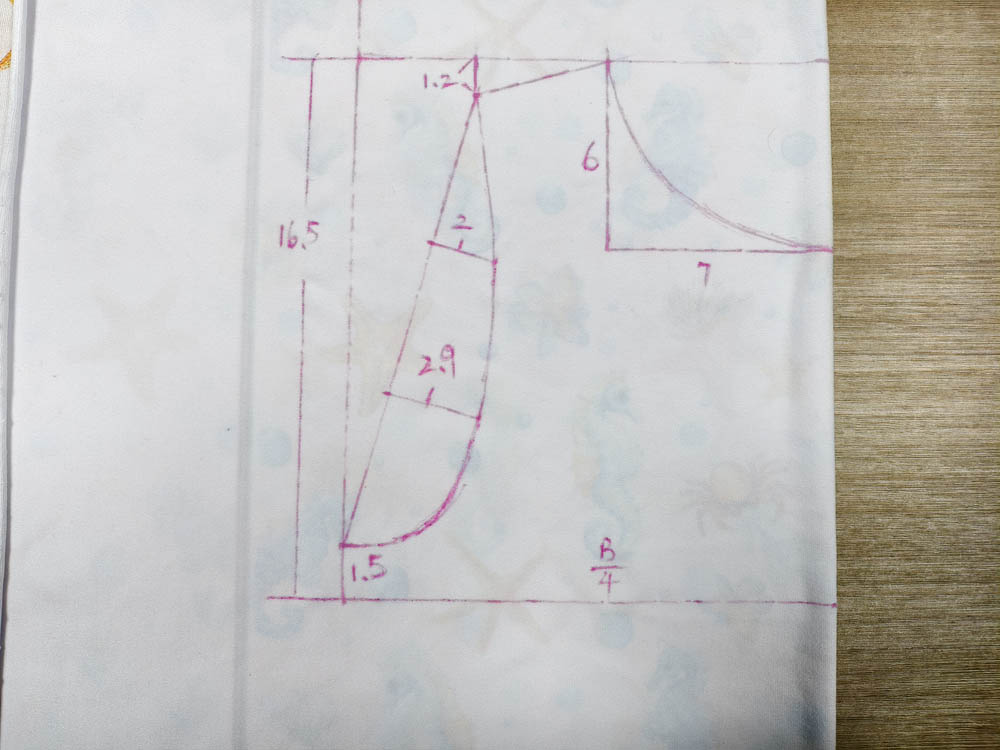
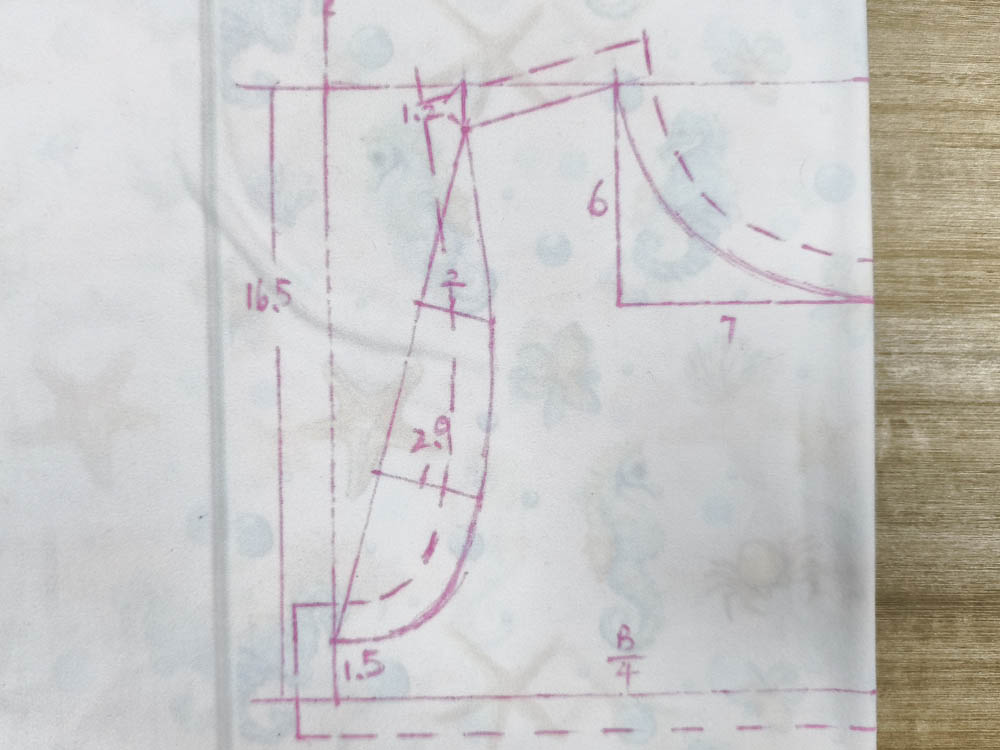
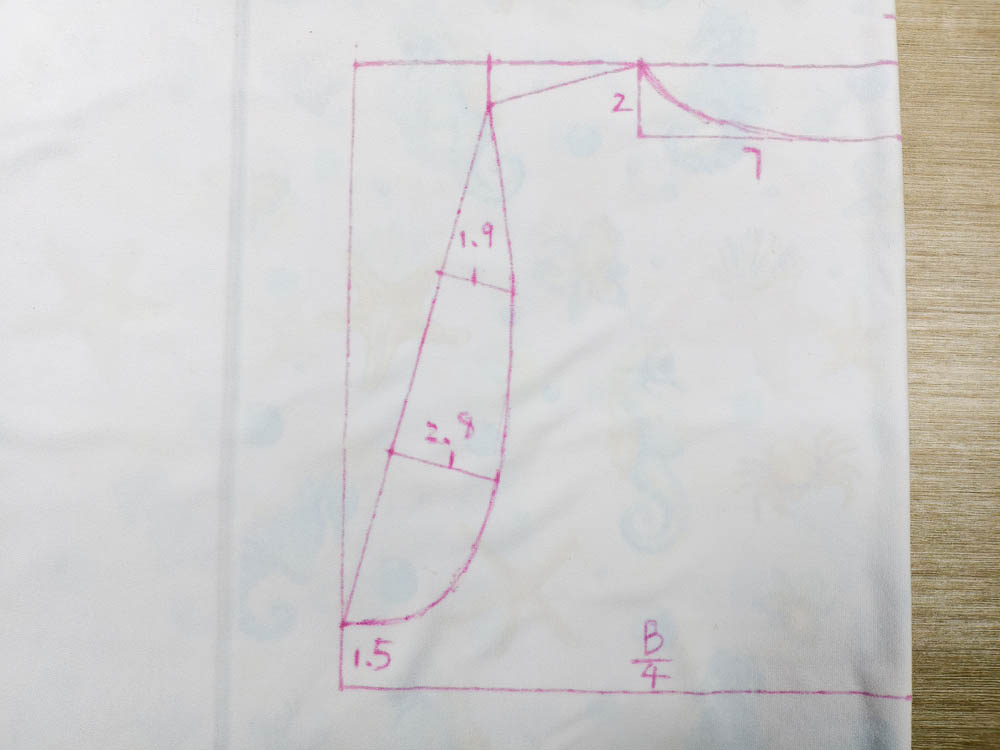
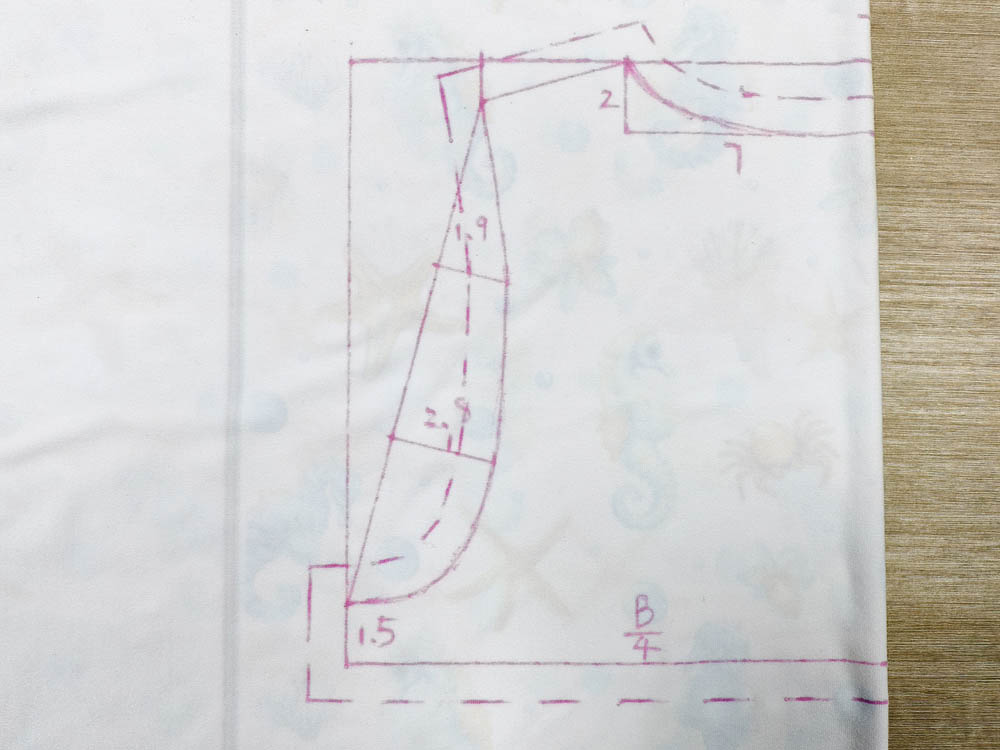
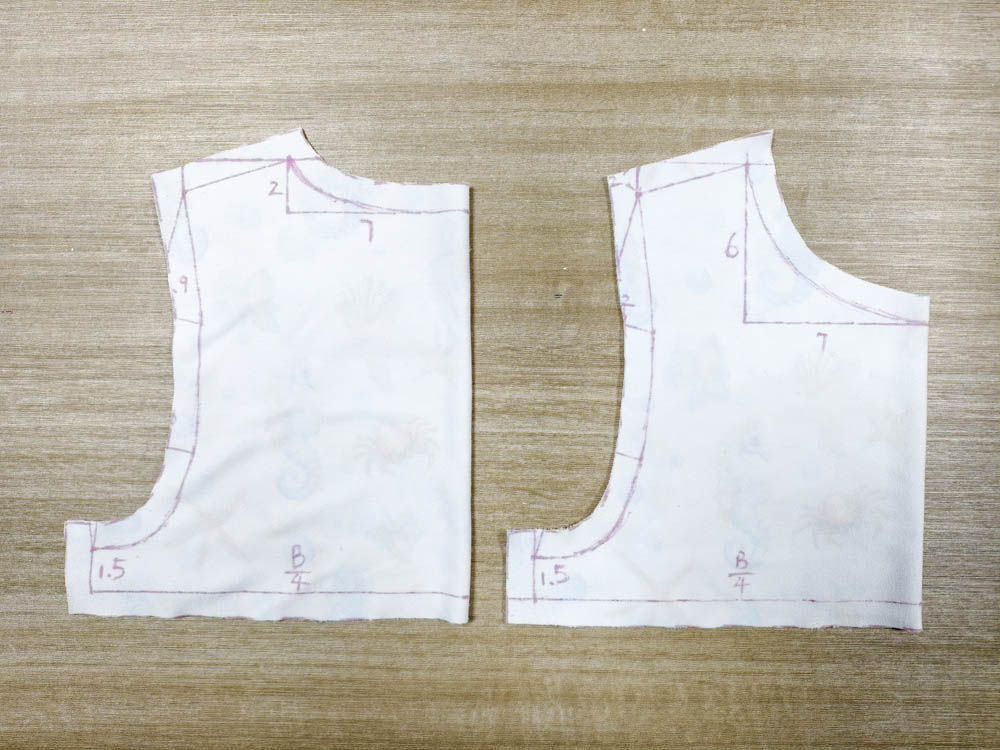
For the front and back pieces, I placed the center line directly on the fold of the fabric.
I prefer this method because it removes the need for a center seam.
The result is:
- a cleaner outside appearance,
- fewer construction steps,
- and a softer inside finish against the child’s skin.
I used a heat-erasable pen and ruler to mark the pattern outlines.
Before cutting, I added:
1 cm (⅜ inch) seam allowance around all sides.
When working with knit fabrics, accuracy during cutting is extremely important.
A small difference at this stage can affect the final fit, especially around:
- shoulders,
- armholes,
- neckline curves.
The 250g DBP performed very well here.
It had enough structure to hold the markings accurately while still remaining flexible enough for curved pattern pieces.
Adding Notches for Easier Assembly
Before moving to the sewing machine, I added small notches around the curved areas.
These included:
- neckline
- armholes
- sleeve cap
The notches were cut into the seam allowance only.
They did not go beyond the stitching line.
These small marks help match pieces later and reduce the chance of uneven stretching when joining curved sections.
For knit garments, especially softer fabrics, these little preparation steps can make the sewing process much smoother.
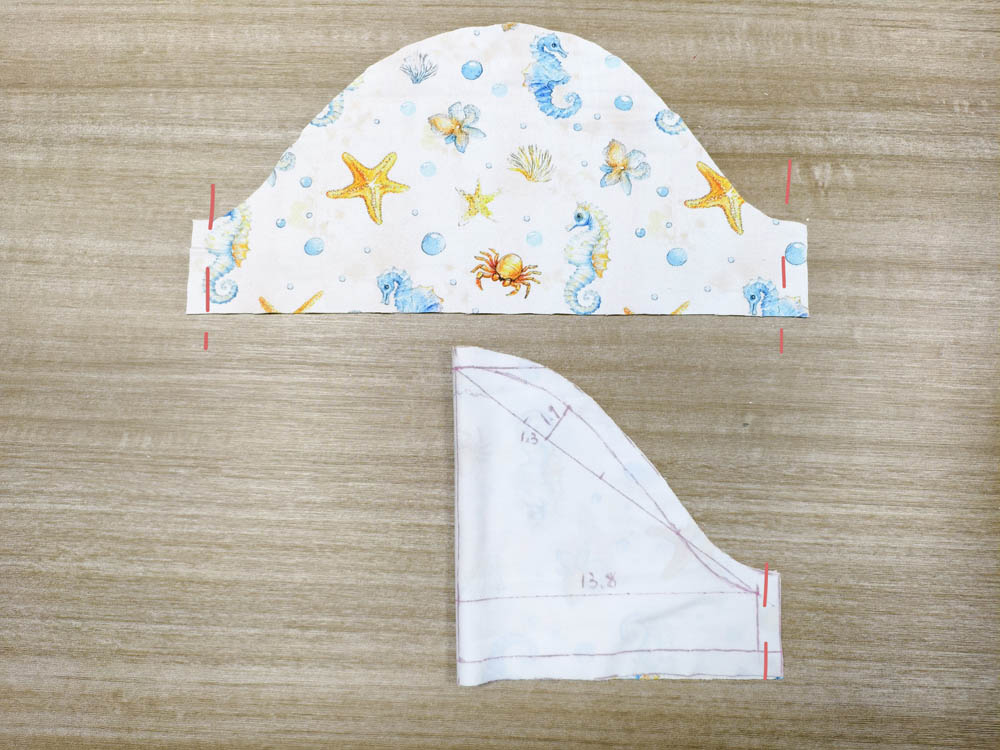
Cutting the Gathered Hem Band
One of my favorite design details in this project was the gathered hem.
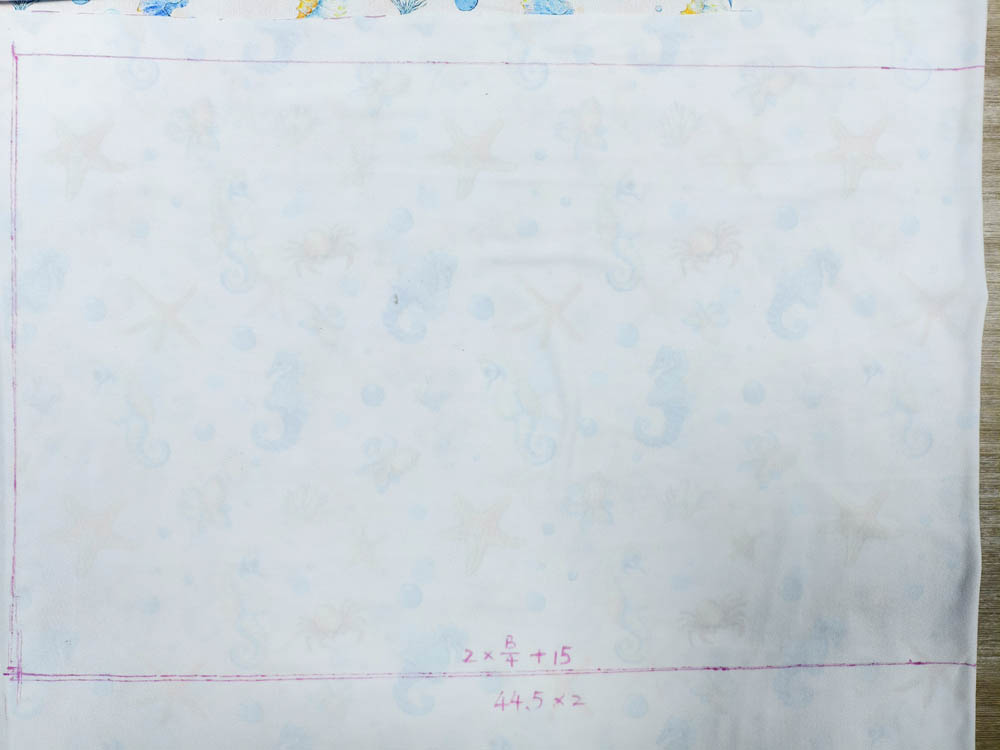
To create the soft peplum effect at the bottom of the top, I cut a simple rectangle for the hem band.
The measurement I used was:
Length: 89 cm (approximately 35 inches)
I intentionally made the band longer than the bottom circumference of the top body so I could create soft, even gathers.
The hem band was cut on the straight grain, not on the fold.
I added:
1 cm (⅜ inch) seam allowance
on all four sides.
This was also a great opportunity to test how the fabric handled gathering.
Some knit fabrics become bulky when gathered, but the 250g DBP created soft fullness while keeping a smooth appearance.
Cutting the Sleeves
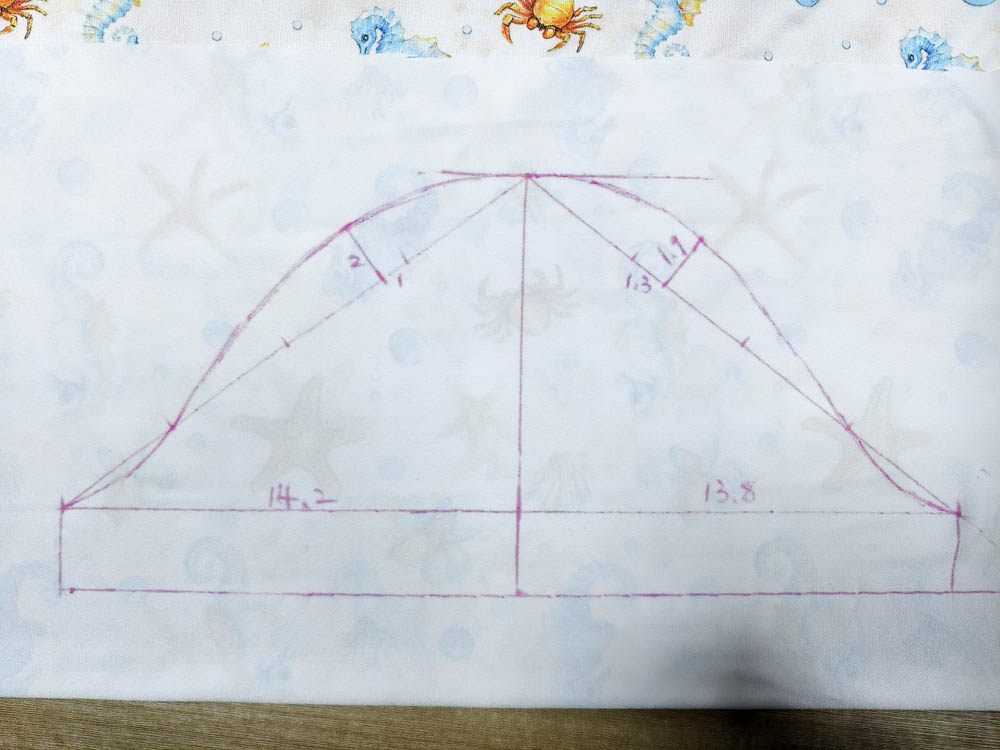
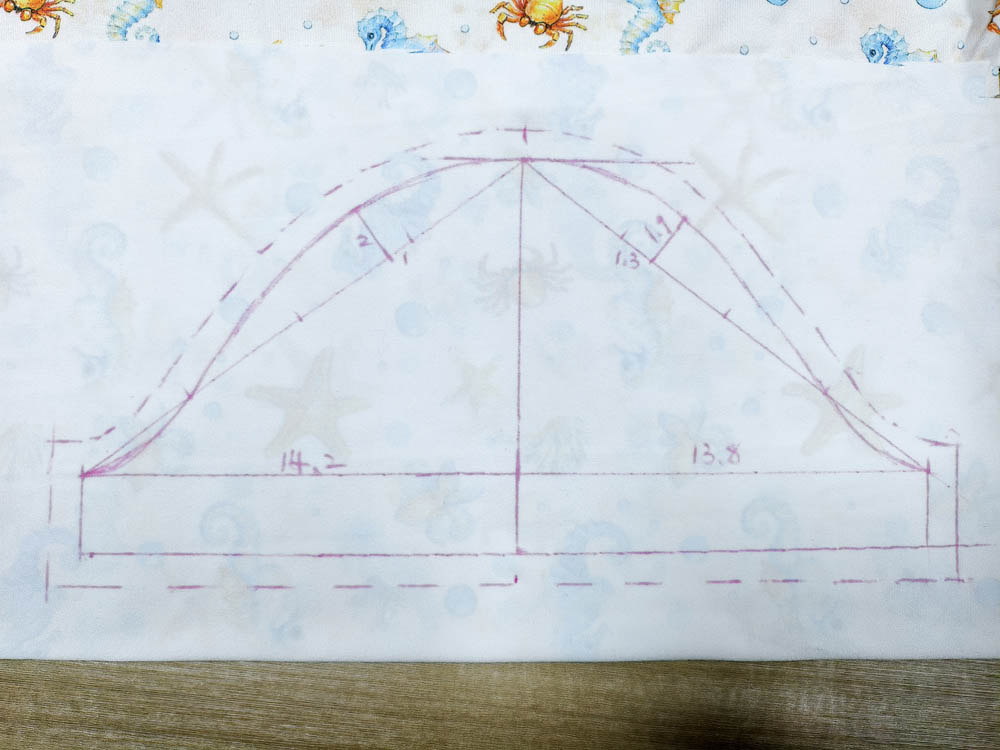
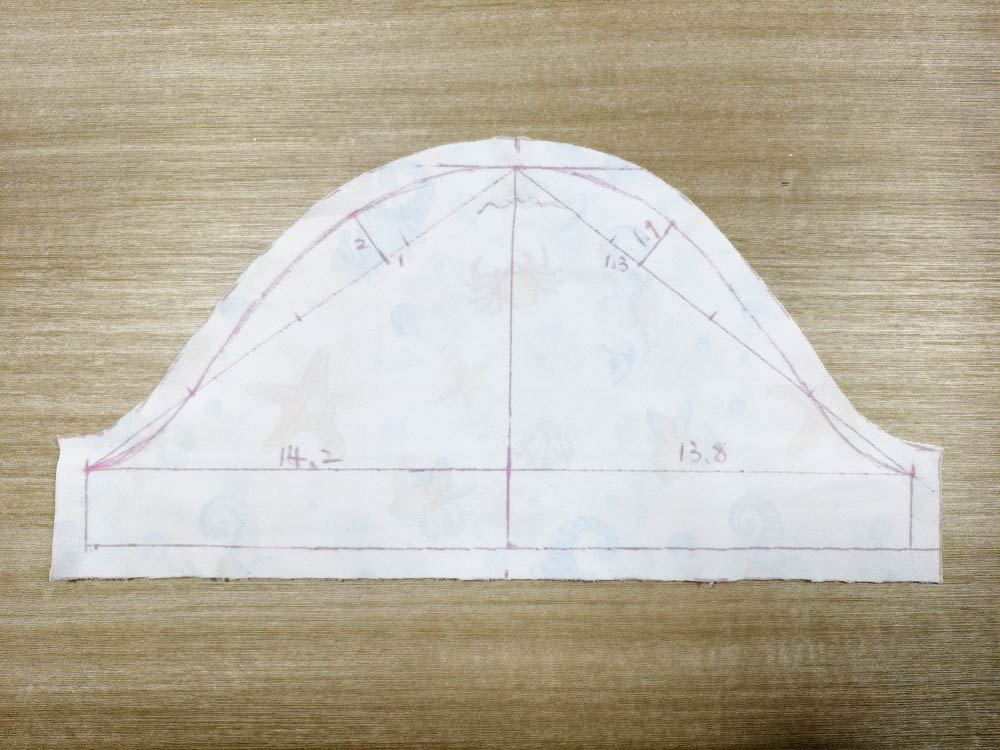
For the sleeves, I placed the sleeve center directly on the fabric fold, similar to the front and back pieces.
I cut two sleeve pieces—one for each arm.
Again, I added:
1 cm (⅜ inch) seam allowance around the edges.
Before sewing, I added small notches along the sleeve cap curve.
I also marked two important points:
- The center point of the sleeve cap
- The underarm point where both sides of the sleeve meet
These reference points make sleeve installation much easier because they help distribute the curve evenly.
The fabric’s recovery was especially helpful during this step.
The sleeve needed to stretch slightly during assembly, but it returned smoothly without losing its shape.
My Cutting Experience With 250g DBP
After cutting all pieces, my overall impression was very positive.
The fabric had the softness I expected from Double Brushed Polyester Knit, but the 250g weight provided an extra level of control during preparation.
For beginners who are nervous about sewing knits, this is one advantage of choosing a slightly heavier knit:
It gives you more stability while still maintaining comfort and stretch.
With all pieces prepared, it was time to move to the sewing machine and begin assembling the garment.
Sewing the Shoulder and Side Seams
With all the fabric pieces cut and prepared, I finally moved to the sewing machine.
This is always the moment when I truly evaluate a knit fabric.
A fabric may look beautiful before sewing, but the sewing process reveals whether it is stable, forgiving, and easy to work with.
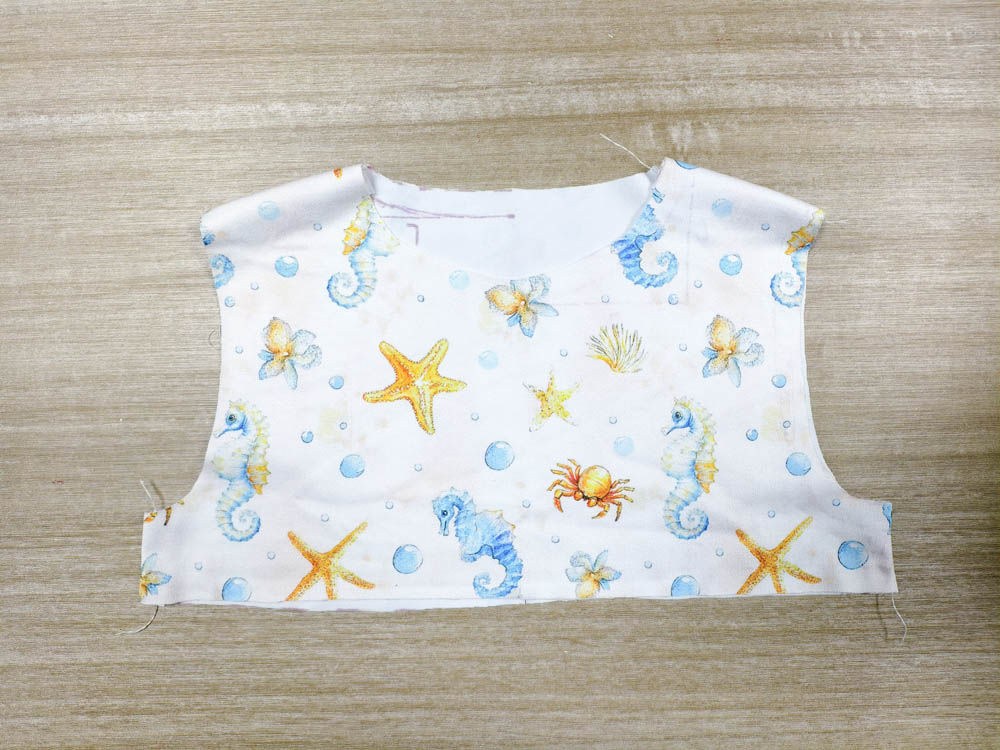
For this project, I started by assembling the main body of the top.
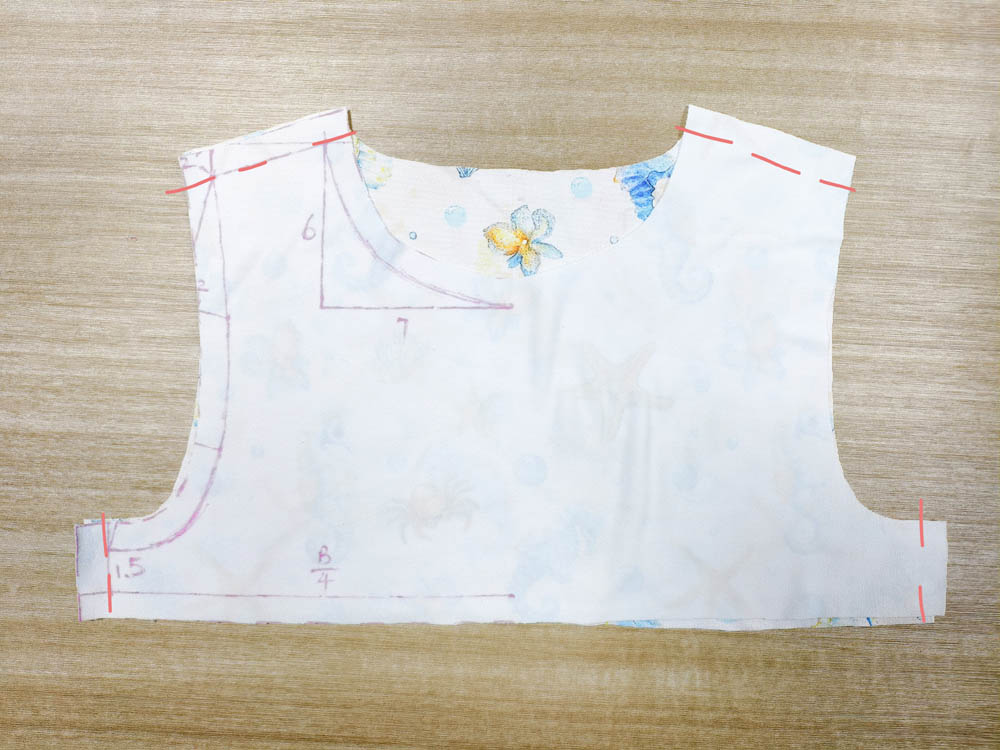
I placed the front and back pieces right sides together, carefully matching the shoulder edges.
Because Double Brushed Polyester Knit is a stretch fabric, I avoided using a regular straight stitch.
Instead, I used a stretch stitch (narrow zigzag or stretch straight stitch) to allow the seams to stretch naturally with the fabric.
I also backstitched at the beginning and end of each seam to secure the stitching.
After sewing, I gently stretched the shoulder seam to check the recovery.
The seam moved with the fabric instead of resisting the stretch, and the stitches returned smoothly without any pulling or distortion.
This was exactly what I hoped to see after my original stretch recovery test.
The fabric performance from the cutting table continued into the actual construction process.
Sewing the Side Seams
After completing the shoulder seams, I moved on to the side seams.
I kept the front and back pieces right sides together and matched:
- underarm points
- side edges
- bottom hem edges
Then I stitched from the underarm area down to the bottom edge on both sides.
At this stage, the top already began to take shape.
Before moving forward, I always check the balance of the garment:
- Are both side seams the same length?
- Are the shoulder seams aligned?
- Does the fabric hang evenly?
The 250g DBP made this process very comfortable.
Because the fabric had enough body, the pieces stayed aligned while sewing.
At the same time, the stretch allowed the garment to remain comfortable and flexible.
This combination of stability and stretch is one of the reasons I enjoy working with this weight for children’s clothing.
Creating the Gathered Hem Band
The gathered hem was one of my favorite details in this design.
It adds a playful shape to the children’s top while also allowing me to test how the fabric behaves with additional volume.
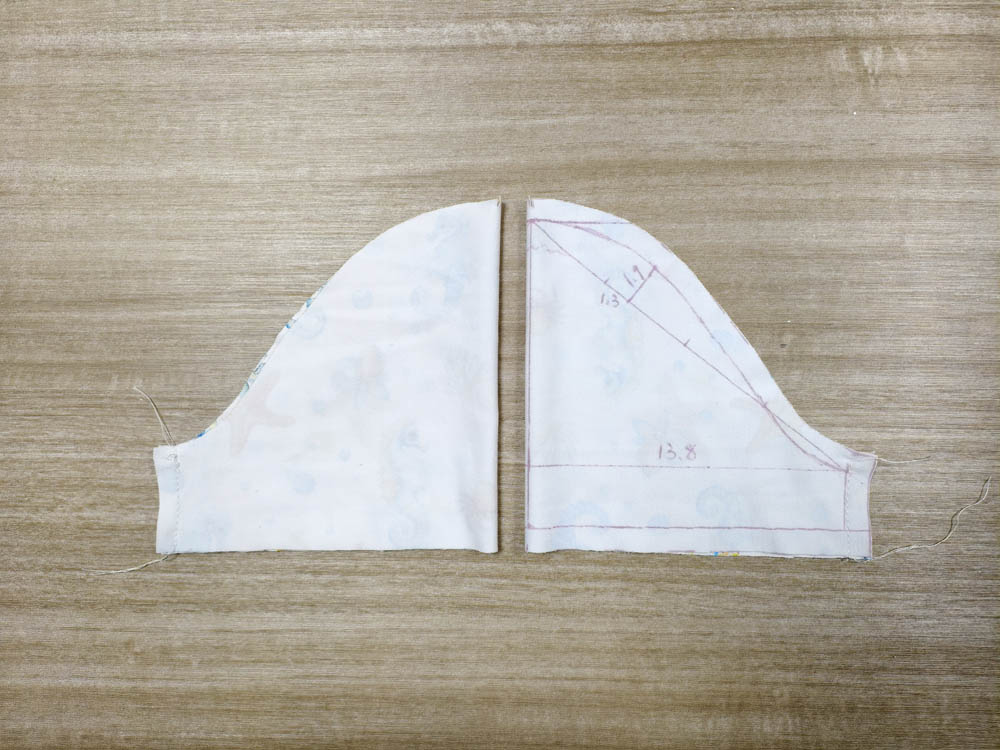
First, I joined the two short ends of the hem band rectangle:
Hem band measurement: 89 cm (approximately 35 inches)
I placed the short ends:
- right sides together
- stitched the seam
- created a continuous fabric loop
After joining the loop, I folded the hem band in half lengthwise with:
- wrong sides together
- raw edges matching
- folded edge facing downward
Because DBP has a naturally smooth brushed finish and relaxed drape, I did not need excessive pressing.
Finger pressing was enough to create a clean fold.
Creating Even Gathers
The hem band was intentionally longer than the bottom edge of the top body.
To create even gathers, I divided both pieces into sections.
I folded the hem band loop into quarters and marked each quarter point with clips.
I repeated the same process with the bottom edge of the top body.
Then I matched:
- hem band quarter points
- top body quarter points
This simple method helps distribute the extra fabric evenly.
Instead of having all the fullness gather in one area, the fabric naturally spreads around the entire hem.
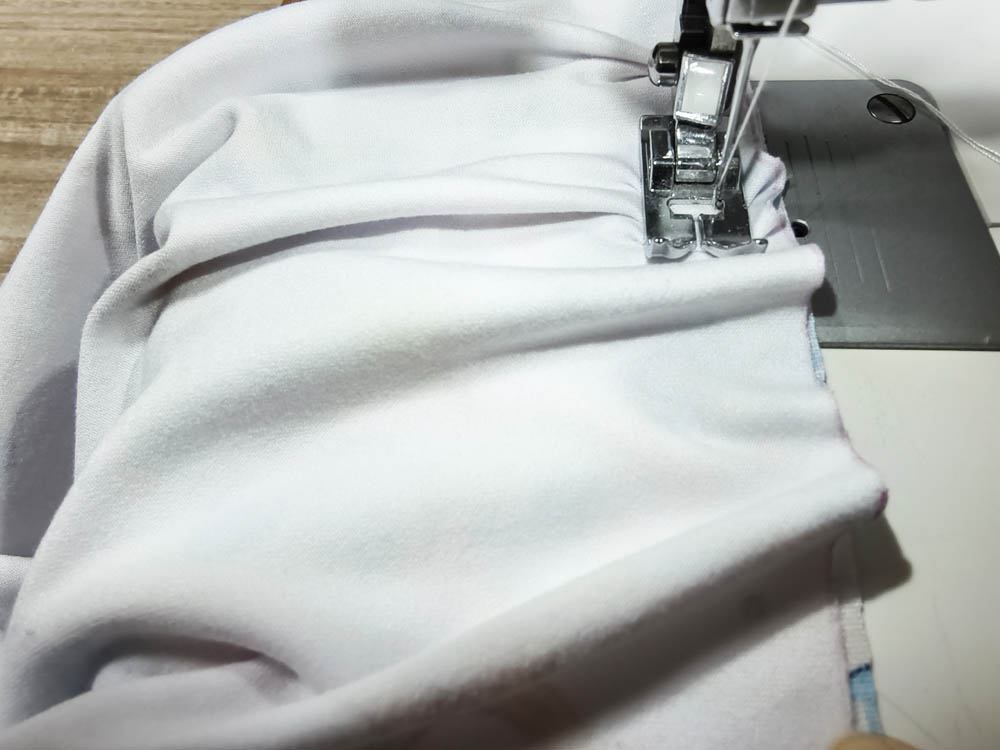
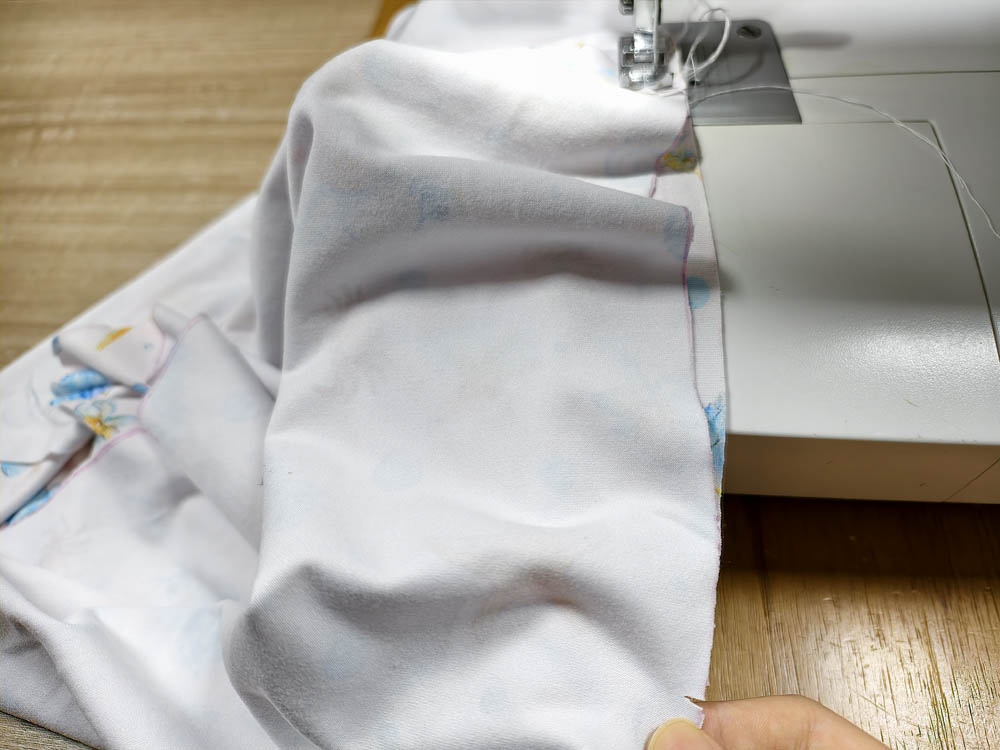
While sewing, I gently stretched the hem band section by section to fit the body piece.
The 250g DBP handled this beautifully.
The fabric created soft gathers without becoming bulky or uneven.
This is an important difference between a fabric that simply stretches and a fabric that is well balanced.
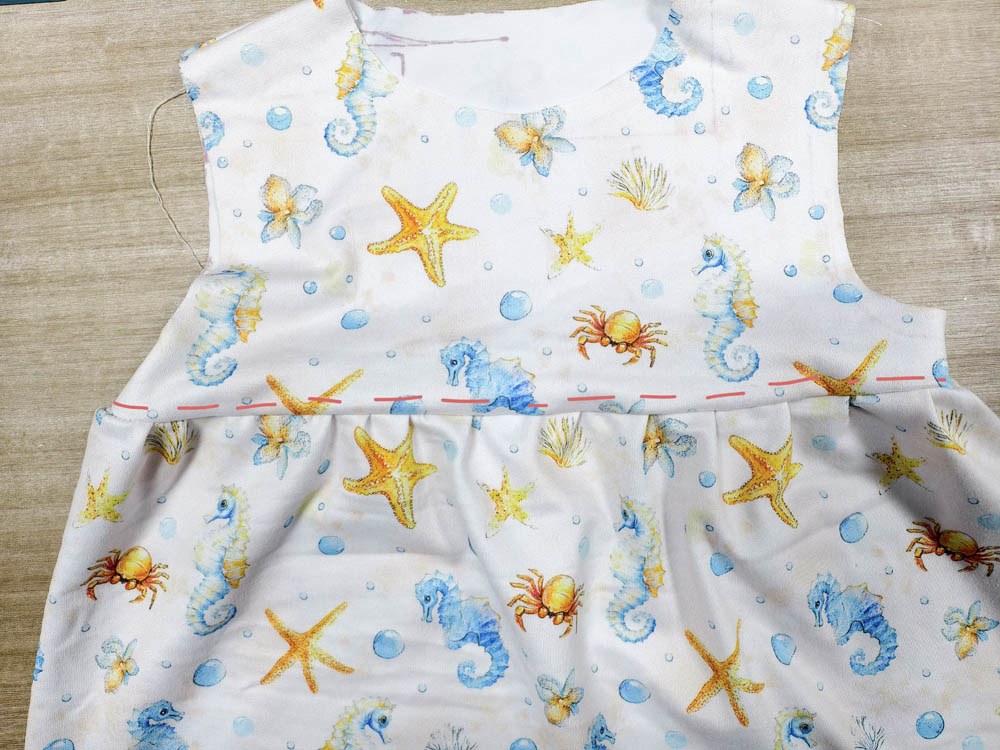
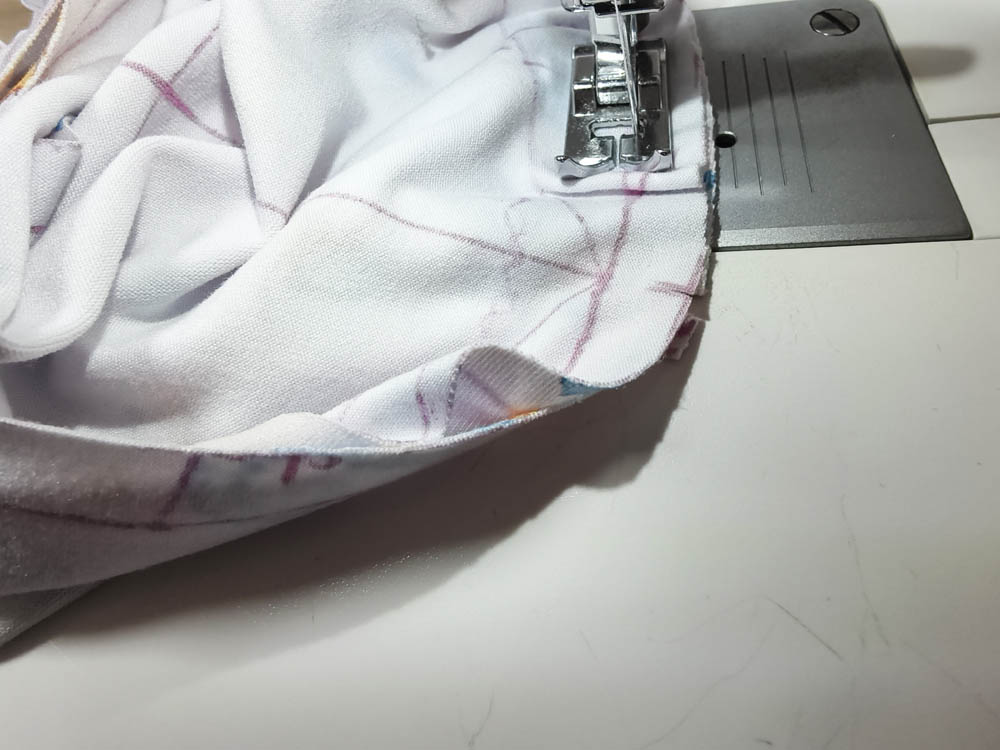
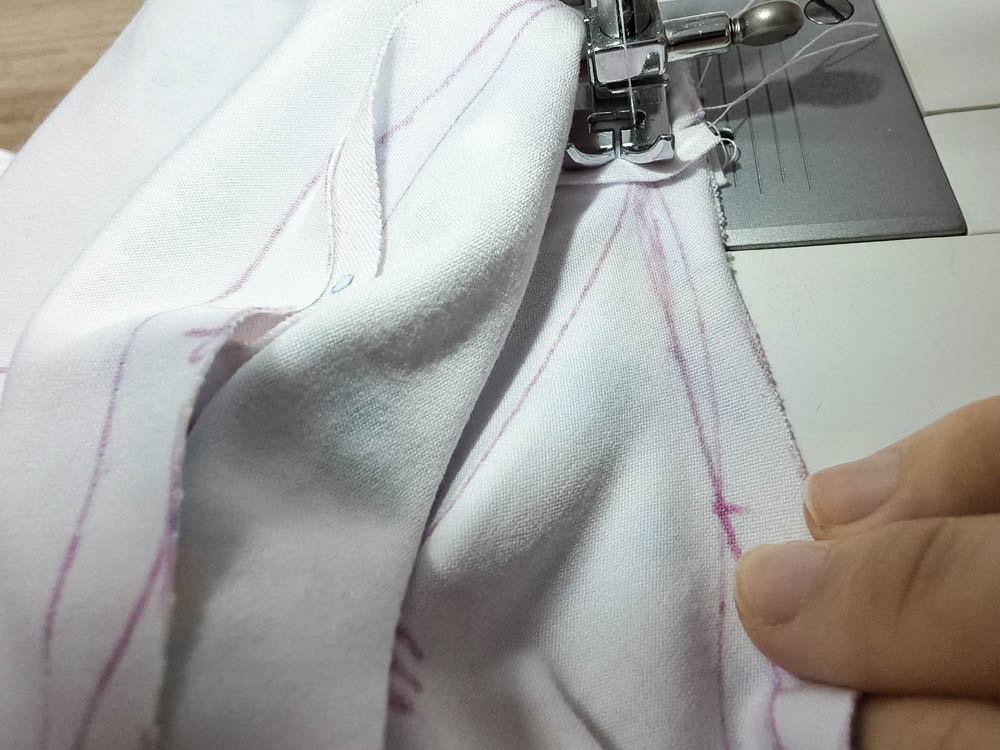
Topstitching the Hem Band
After attaching the gathered hem band, I turned the garment right side out.
I added topstitching approximately:
2 mm (1/16 inch) from the seam line
This step serves two purposes:
- It creates a cleaner finished appearance.
- It helps keep the seam allowance positioned neatly.
The final result looked similar to a ready-to-wear garment finish.
The fabric maintained its softness while still holding the gathered shape.
Finishing the Bottom Hem, Neckline, and Sleeves
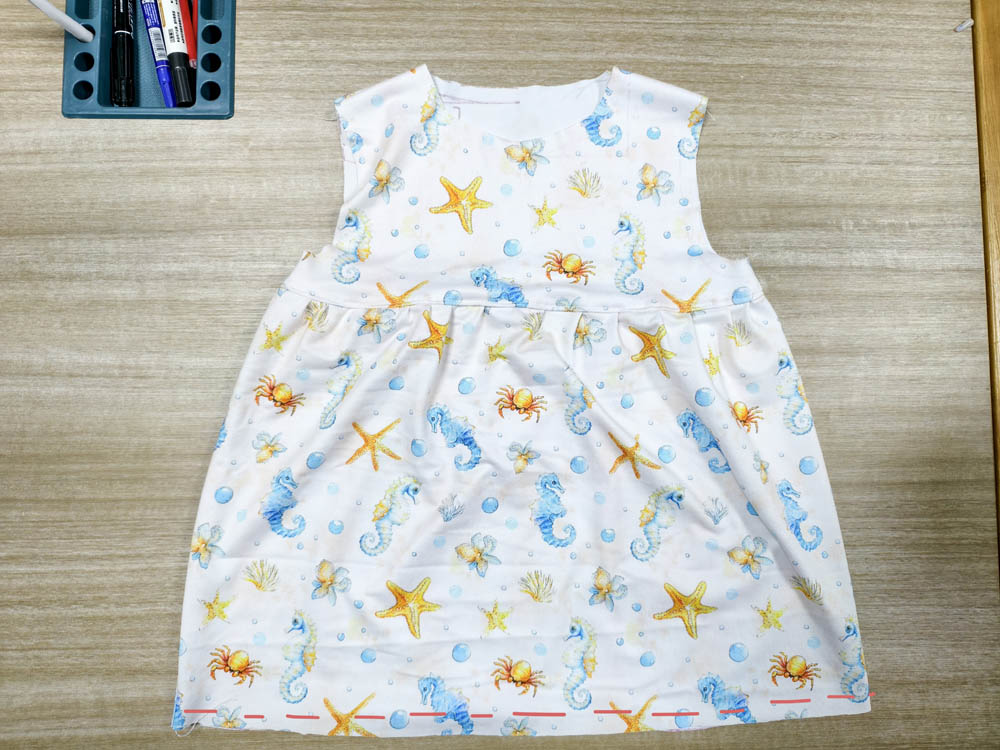
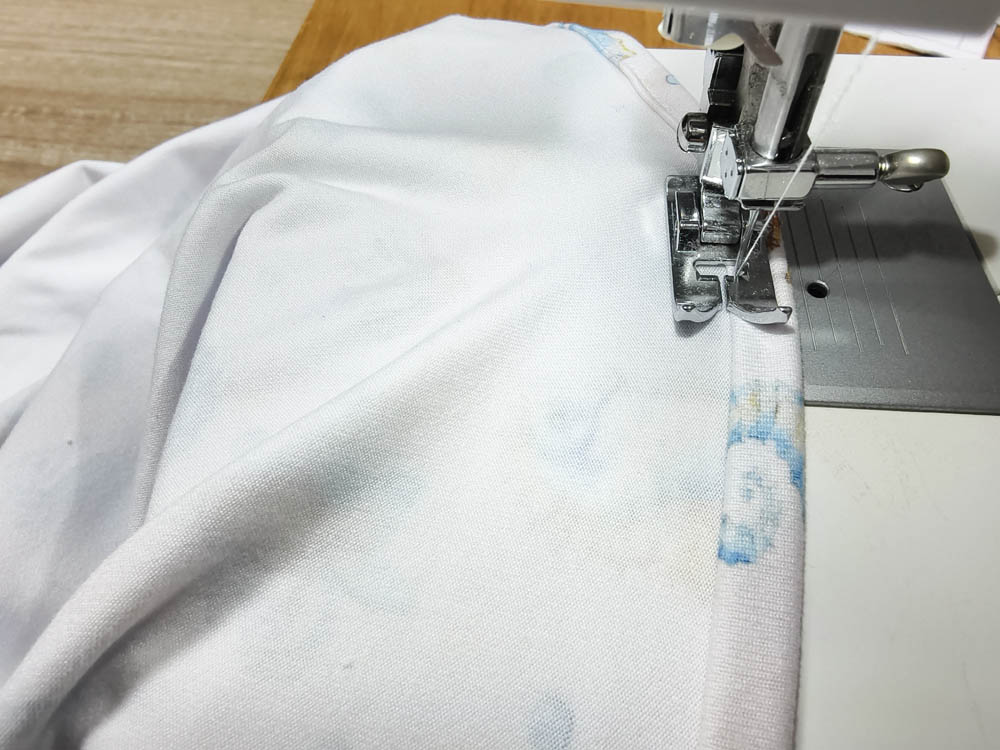
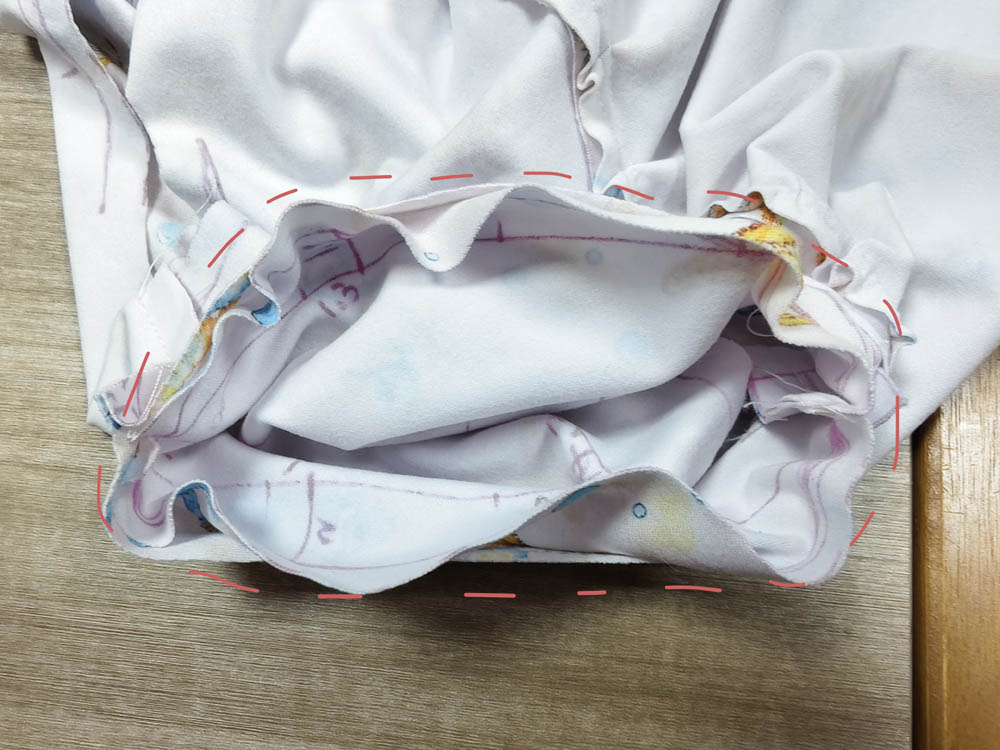
For the remaining raw edges, I used a simple double-fold hem method.
The same finishing technique was applied to:
- bottom edge of the hem band
- neckline
- sleeve openings
For the bottom hem, I first folded the raw edge inward:
0.7 cm (¼ inch)
Then I folded it again:
1 cm (⅜ inch)
This completely enclosed the raw edge and created a clean finish.
I stitched close to the inner folded edge from the right side.
Finishing the Curved Neckline
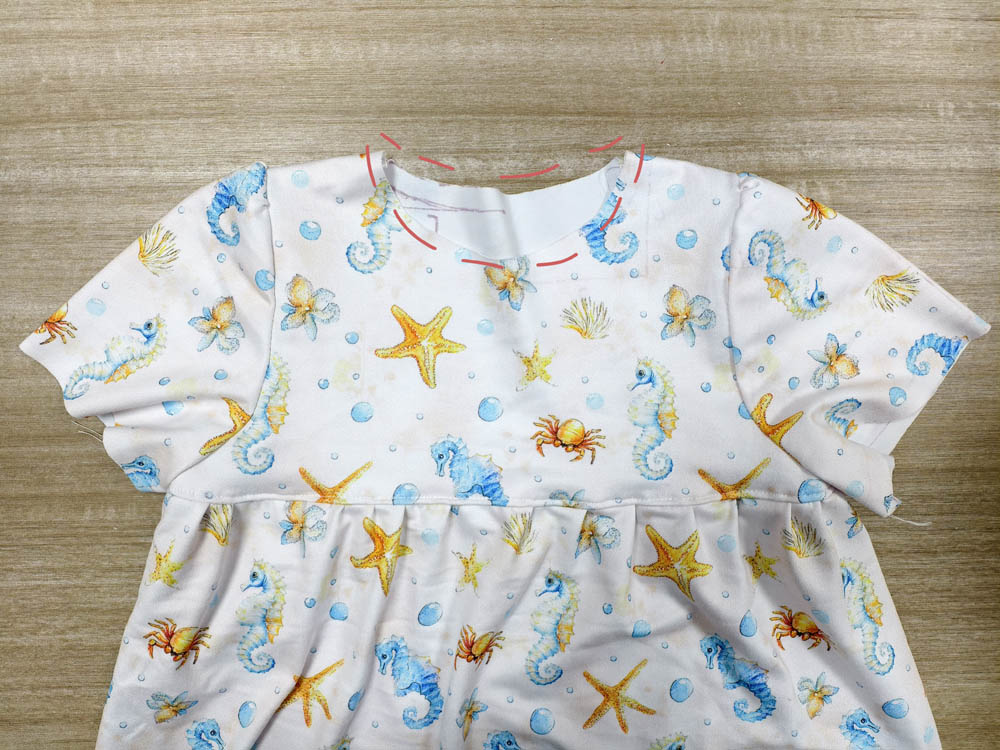
The neckline required a little more attention because curved areas can be challenging with knit fabrics.
Before folding the neckline edge, I added small clips into the seam allowance.
These small V-shaped cuts:
- release tension,
- allow the curve to open,
- help the fabric lay flat.
The clips stopped before reaching the stitching line, keeping the seam secure.
After clipping, I folded:
First fold:
0.7 cm (¼ inch)
Second fold:
1 cm (⅜ inch)
Then I carefully stitched around the curve.
The recovery of the DBP was especially noticeable here.
A neckline is one of the first areas where a lower-quality knit can show problems.
After stretching and releasing the neckline several times, it returned smoothly without becoming loose.
Setting the Sleeves
Sleeves can sometimes feel intimidating, especially when working with stretch fabrics.
However, the preparation steps made this process much easier.
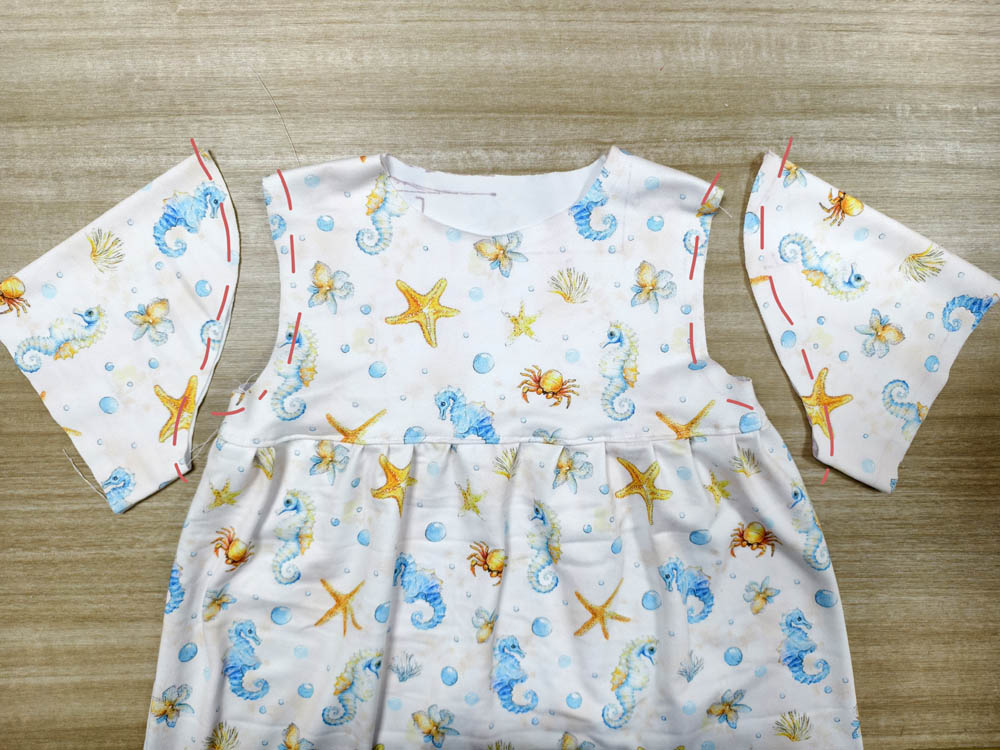
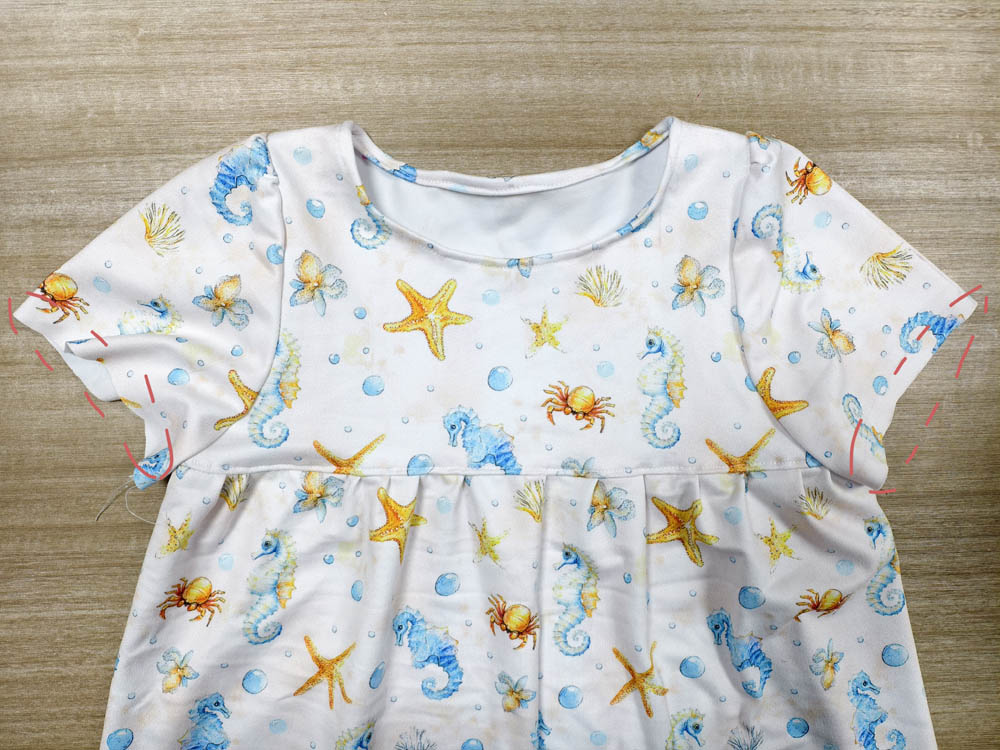
I turned the body of the top right side out and placed the sleeve inside the armhole.
The right sides of the sleeve and body were facing each other.
I matched the two key points I marked earlier:
Sleeve cap center
Matched with:
→ Shoulder seam
Sleeve underarm point
Matched with:
→ Side seam
Once these points were secured, the rest of the sleeve naturally followed the armhole curve.
I started sewing from the underarm point and worked around the curve.
The sleeve cap contains slightly more fabric than the armhole because it needs to create the shape of the shoulder.
I gently eased the extra fabric into place without stretching the armhole.
The 250g DBP made this step surprisingly easy.
There were:
- no puckers,
- no uneven folds,
- no repeated adjustments.
The fabric had enough flexibility to adapt while still maintaining control.
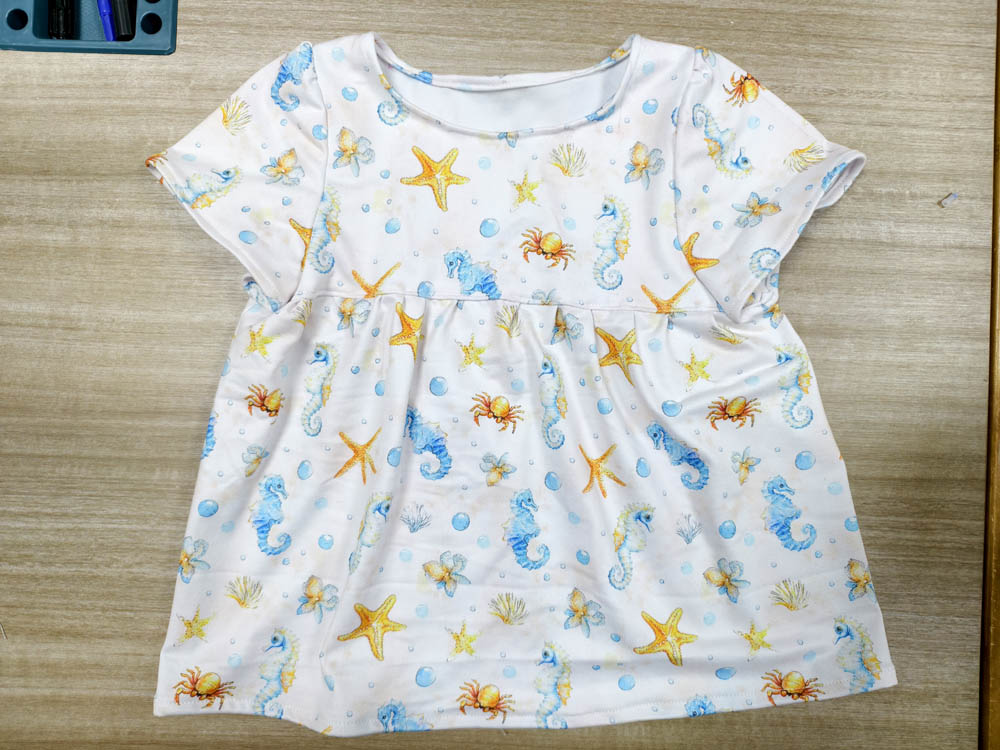
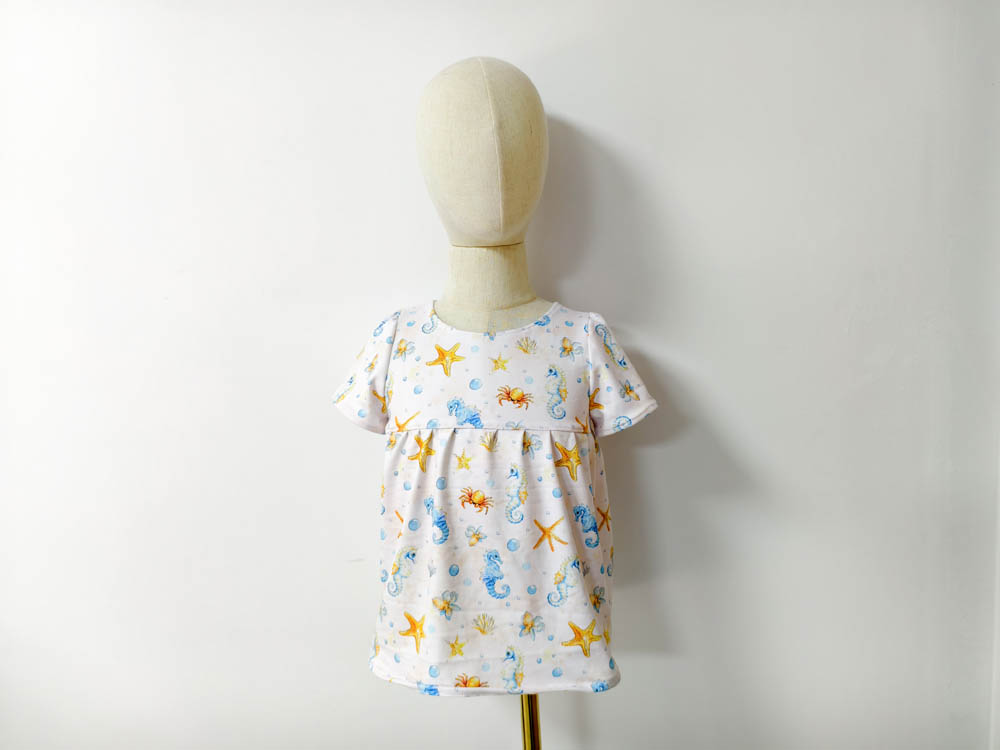
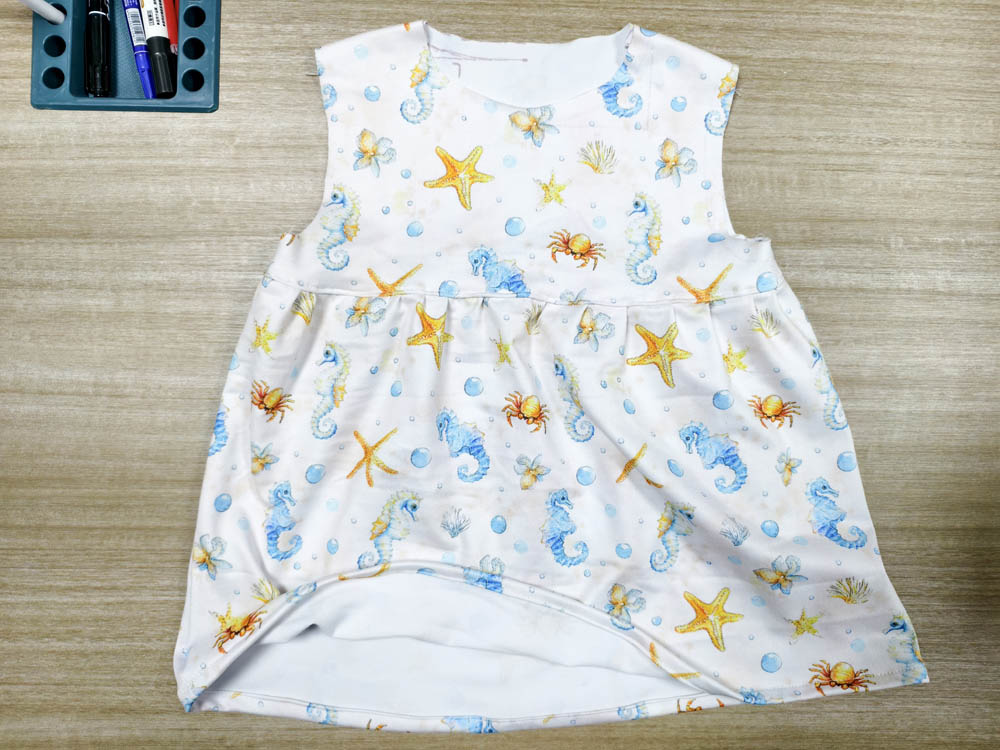
The Finished Garment: My Final Thoughts After Sewing With 250g DBP
After completing this project, the most important thing for me was not whether 250g DBP was the “best” weight.
Instead, I wanted to know:
Did it create the type of garment I imagined?
For this children’s outfit, the answer was yes.
The finished top had the soft, comfortable feel I wanted, while the slightly heavier weight helped the design keep its shape.
The gathered hem maintained its fullness, and the overall silhouette looked neat without feeling stiff.
The matching pants also worked well as part of the set, providing comfortable movement while keeping a clean appearance.
After Wearing and Washing
After Wearing and Washing
A fabric is only truly tested after it becomes part of everyday life.
After wearing and washing the outfit, I checked the areas that usually show changes first:
Area Checked | My Observation |
Overall Fit | The garment maintained its original shape and size |
Neckline | Stayed smooth without losing recovery |
Sleeve Openings | Remained comfortable and stable |
Gathered Hem | Kept its fullness without becoming flat |
Waistband | Recovered well after repeated stretching |
Fabric Feel | Continued to feel soft and comfortable |
For children’s clothing, this kind of performance is especially important because garments need to handle:
- daily movement,
- frequent washing,
- and repeated wear
Would I Choose 250g DBP Again?
For this project, absolutely.
The reason is not because 250g is the heaviest option.
It is because it matched the design goal.
I wanted this children’s outfit to feel:
- cozy,
- durable,
- comfortable,
- and well-structured.
250g DBP delivered exactly that.
However, if I were making a lightweight summer dress, my choice would likely change to 170g or 200g.
That is the biggest lesson from comparing all three weights:
The best fabric is not the heaviest fabric. It is the fabric that fits your project.
Final Advice From Cora
After testing and sewing with all three DBP weights, my recommendation is simple:
Before choosing your fabric, think about:
Question | If Your Answer Is… | Recommended Weight |
Do you need lightweight comfort? | Yes | 170g DBP |
Do you want one fabric that works for many projects? | Yes | 200g DBP |
Do you want more structure and shape retention? | Yes | 250g DBP |
For this children’s outfit, 250g DBP was the right choice.
But your perfect DBP may be different depending on what you are creating.Ready to try DBP for your next project? At Doris Fabric, we offer 170g, 200g, and 250g Double Brushed Polyester Knit in custom cuts. Feel free to reach out—I’m happy to help you pick the right weight for your project!
Happy sewing!
Frequently Asked Questions About Double Brushed Polyester Knit (DBP)
After sharing my fabric testing and sewing experience with 170g, 200g, and 250g Double Brushed Polyester Knit, these are some of the most common questions I receive from other sewists.
How should I wash and care for DBP fabric?
I always recommend machine washing in cold water (30°C / 86°F) on a gentle cycle. Turn the garment inside out to protect the brushed surface. Tumble dry on low heat or hang to dry—high heat can affect the stretch recovery over time. I’ve washed this outfit several times and it still feels as soft as day one.
Does DBP pill after repeated wear?
Not with good-quality DBP. The dense knit construction and polyester blend resist pilling well. In my testing, even after wearing and washing, I didn’t see any fuzz balls on the 250g fabric. Just avoid washing with rough items like zippers or Velcro, which can cause abrasion.
Is DBP suitable for activewear like leggings or dancewear?
Absolutely—especially the 200g and 250g weights. The four-way stretch and excellent recovery make it perfect for leggings, yoga pants, and kids’ activewear. Just keep in mind that 170g is lighter and better for lounge or summer tops, while 250g gives more compression and support.
Does 170g DBP show skin or underwear through it?
Surprisingly, no. Even though it’s the lightest option, the knit is dense enough to provide good coverage. I held it up to light and could barely see through it. For a lightweight fabric, it’s much more opaque than most knits in its weight class.
Is 250g DBP too thick for summer?
It depends on your climate and the garment design.
Although 250g DBP is heavier than 170g and 200g, it is still soft and flexible because of its brushed knit construction.
However, for extremely hot summer weather, I would personally choose 170g or 200g more often.
I prefer 250g for:
- children’s outfits,
- hoodies,
- joggers,
- cooler seasons,
- garments that need more structure.
Does DBP shrink after washing?
After washing the finished outfit, I checked:
- garment size
- overall shape
- fabric feel.
The garment maintained its original fit well.
However, I still recommend pre-washing any fabric before cutting.
Every fabric behaves slightly differently, and pre-washing gives you confidence before starting your project.
Does DBP lose stretch after washing?
A high-quality Double Brushed Polyester Knit should maintain its stretch and recovery after proper care.
During my testing, stretch recovery was one of the qualities I paid close attention to.
The difference between 170g, 200g, and 250g was not whether they recovered—it was the amount of structure each weight provided.
Is Double Brushed Polyester Knit see-through?
The opacity depends on the fabric weight and construction.
During my comparison, I found that even the lighter 170g DBP provided good coverage because of its dense knit structure.
The 200g and 250g versions naturally offered more body and coverage.
Which DBP weight should beginners choose?
If you are making your first project with Double Brushed Polyester Knit, I would recommend starting with 200g DBP.
During my testing, I found:
- 170g DBP is lightweight but requires a little more attention because it has less body.
- 200g DBP provides the easiest balance between softness, stretch, and stability.
- 250g DBP is also beginner-friendly because the extra weight makes it easier to handle.
For most beginners, 200g is the safest starting point.

Fashion Designer | Fabric Specialist at Doris Fabric
Hi, I'm Cora.
I'm a fashion designer at Doris Fabric and a lifelong sewing enthusiast. Every week, I work with different knit fabrics—from testing new materials to turning them into wearable garments.
Instead of simply reading fabric specifications, I believe the best way to understand a fabric is to sew with it.
Through this blog, I share my real sewing experiences, fabric comparisons, and practical tips to help fellow sewists confidently choose the right fabric for every project.